Exporting to Reveal
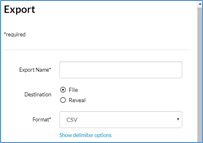
If Reveal Integration is enabled, you can select to export directly to Reveal. In the Bulk Actions Export dropdown, there are two choices for Destination: File and Reveal.
If you select Reveal, the Export dropdown options will change as shown below:
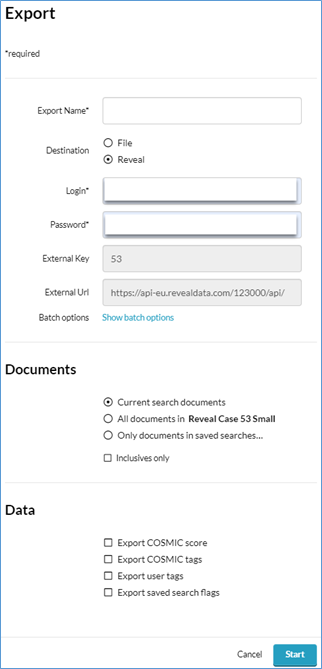
When exporting to Reveal, you will need to enter the following information:
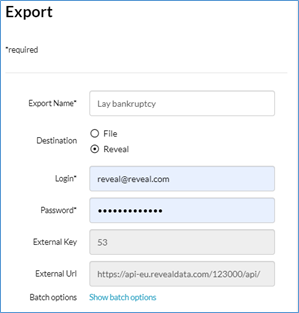
Export Name: Choose a name for your export.
Login: Enter your Reveal Login.
Password: Enter your Reveal Password.
External Key: Reveal Case Number will automatically populate.
External URL: Reveal Instance Location will automatically populate.
You will need to make the following decisions:
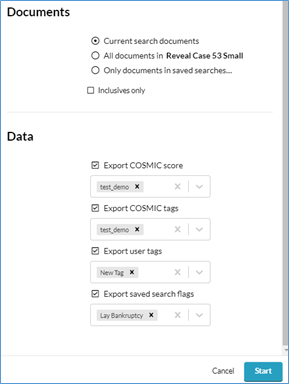
Documents: Choose to export all current search documents, all documents in your storybook, or only documents part of saved searches.
Data: Choose the data source for each of the four options.
Upon clicking Start, the export will begin to build. You can view the status in the Notifications center or the storybook dashboard.
Selection | Reveal Names/ Format |
|---|---|
Cosmic Scores | Reveal Field name format:
[Cosmic Group Name]Value format:
|
Cosmic Tags | Column/Reveal Tag Set format:
For Document level COSMIC Tags, the possible values are
For Segment level COSMIC Tags, the export value will be
|
User Tags | User Tags are exported as individual tags under one tag set called NexLP_UserTags. |
Saved Searches | Saved Searches are exported as Work Folders. Each Saved Search becomes a separate folder under WorkFolders/NexLP_Saved_Searches parent folder. Value format:
|
See Appendix C for more information on what to expect to see in Reveal once you export.