Applying Redactions and Highlights
Redactions are applied in the Image View of the Document Review Window. When the Image View is selected, the Image View toolbar appears below the Document Review toolbar. It is used for navigating image pages, adjusting the size and fit of the image, and making annotations and redactions on the image.

Applying Redactions
To apply redactions (which may only be added to the Original image set):
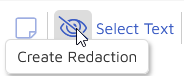
Choose the Select Text button to choose which text appears on the redaction.
Multiple redaction options can be created, depending on the needs of the reviewers. Users with the appropriate permissions can add new redaction text to a redaction profile. A new redaction label can be added by utilizing the +Add button in the Select Redaction Text window.
Select the Create Redaction button next to the Select Text button, then click and drag to apply the redaction.
The redaction appears on the text with a translucent box that can be sized or adjusted as needed. The redaction can be deleted by right-clicking on it and choose Delete.
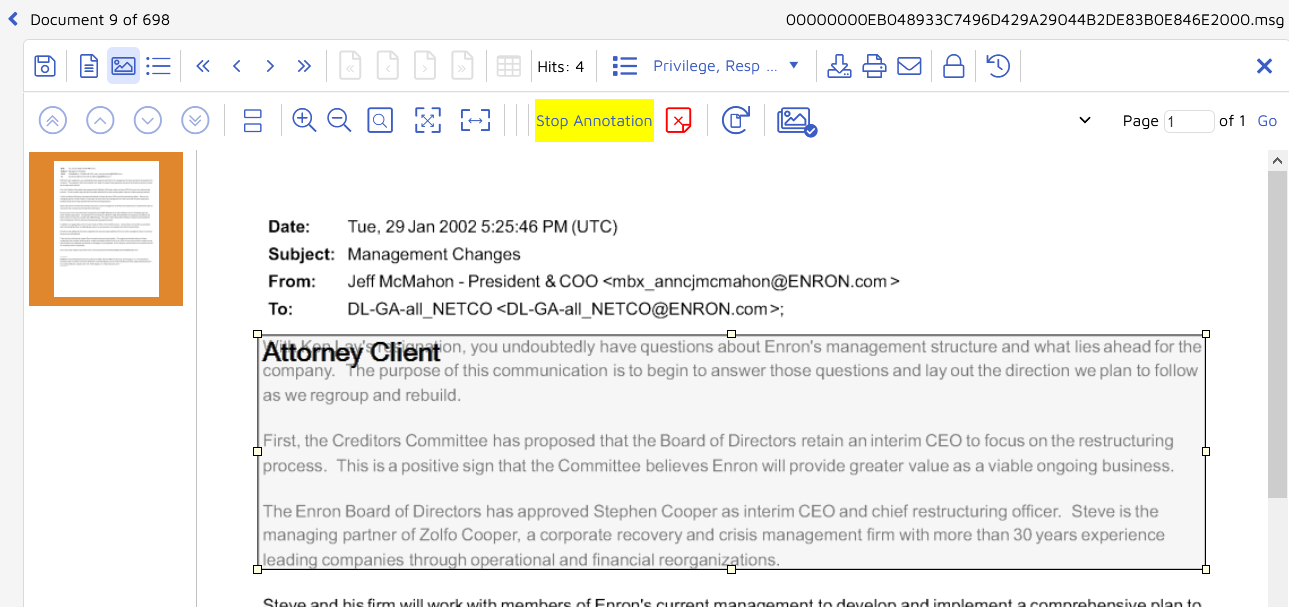
If you want to add multiple redactions of the same type hit the Enter button after each redaction to apply additional redactions, as long as the Stop Annotation button is highlighted in the Image View toolbar.
Note
By design, redactions can only be applied on the Original image set. Images loaded to other image sets cannot be redacted.
Note
Among other use cases, Redaction Profiles may be used for specific productions. In this way, preparing a redaction profile that is specific to the current production allows users to select and apply a different set of document redaction labels to documents that may be produced in multiple productions. For example, a Production01 Redaction Profile may have been prepared, and the new labels PII, PSI and SSI added, in anticipation of a production addressing privacy and security issues.
Applying Highlights, Freehand, Text, Sticky Note Annotations

Highlights can be applied by clicking on the Highlighter Annotations button. When selected, the icon turns to a plus sign and allows you to click and drag a highlight which can then be resized or moved.
FreeHand Annotations can be applied by clicking on the FreeHand Annotation button. When selected, the icon turns to a plus sign and allows you to freely draw on the document image.
Text Annotations and Sticky Notes can also be applied where textual information is deemed to be useful to the review team.
All applied annotations can be selected, moved, resized or deleted as needed.