Creating and Managing Projects
Projects are the Reveal database structures within which document review, coding and production take place. There may be multiple projects for each Client (along with multiple Clients for each Reveal Company instance). Client Users are grouped and assigned to Projects, security is set, data are loaded and processed, and archives of projects may be created.
The creation and management of Projects is done by project managers and administrators either in the back-end Reveal Review Manager or in the Company Admin under the Flyout Menu.
Creating a Project
To create a project under Company Admin > Projects:
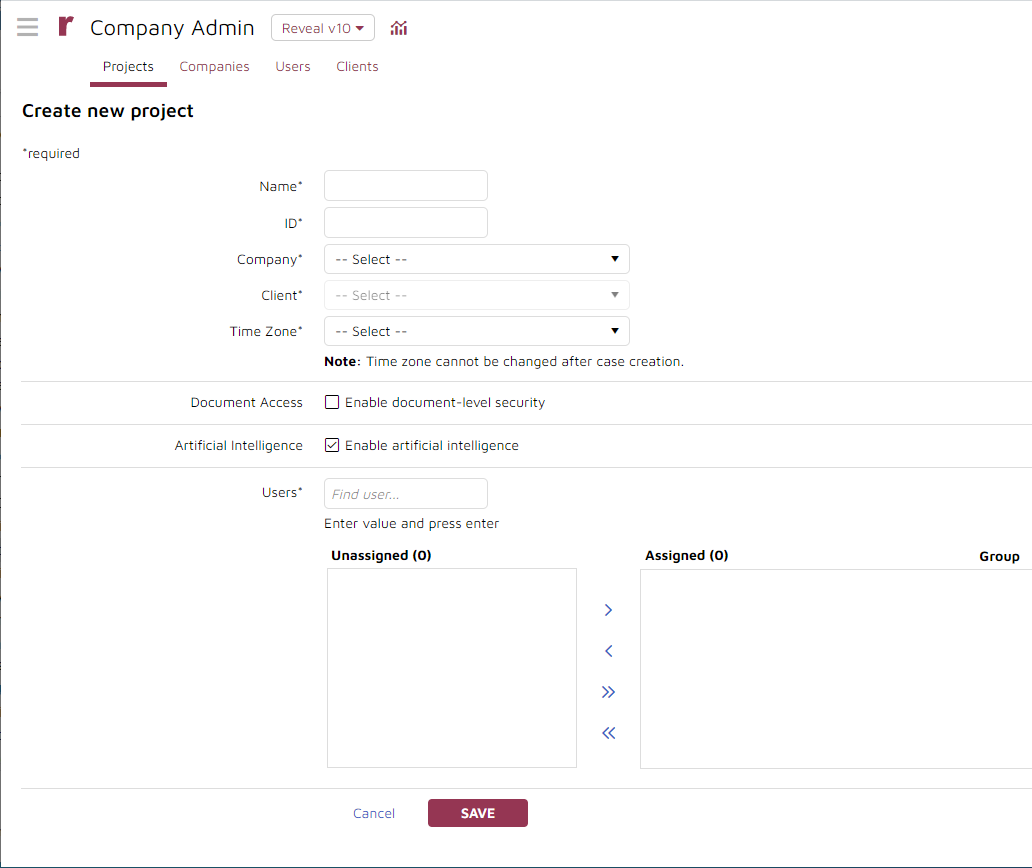
Navigate the Flyout Menu to the Company Admin page. It opens to the Projects tab.
Click the Create new project button in the upper left corner. This will launch the create project screen.
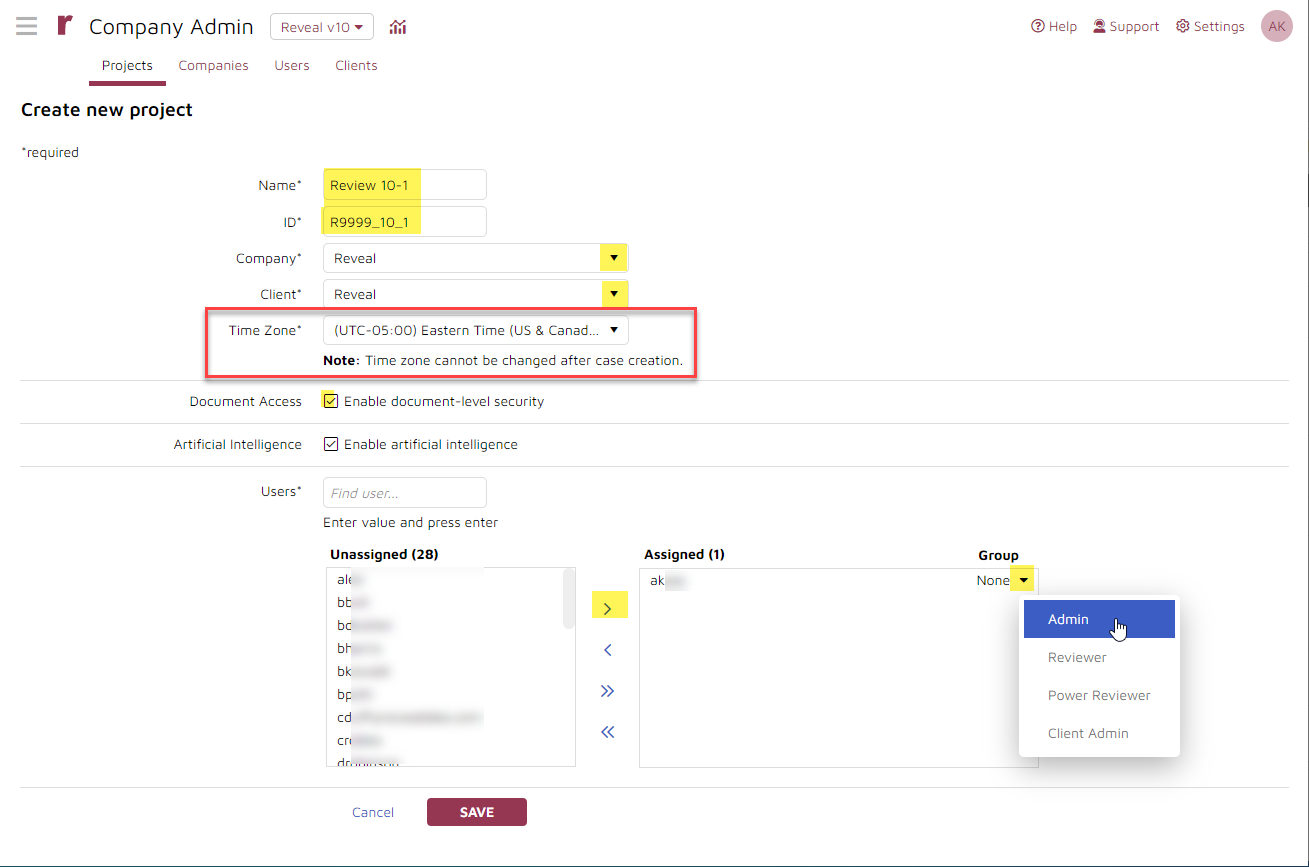
Name the project (required).
Assign a project id (required).
Associate the project with a Company, selecting from the dropdown list (required). The User list below populates when the Company is selected.
Associate the project with a Client, selecting from the dropdown list (required).
Select Enable document-level security to extend Reveal security to individual documents; this must be selected for use.
Enable artificial intelligence is enabled for all projects by default.
Set your project's review Time Zone to automatically normalize email metadata shown in HTML, extracted text and tiff-on-the-fly views to match the timezone that is set for your project here. Reveal will also normalize email metadata shown in images when performing a production or print job.
Assign Users to the project.
Select a Group for each user who is added to the project. The group is what is used to assign permissions for the user for this project. You must add at least one user - ideally an Admin or Client Admin - to finish creating a project.
Confirm your information and click the Save button to create the project. It will look like this to show that the project is being created:

A pop-up will notify that the project has been successfully created.
Managing a Project
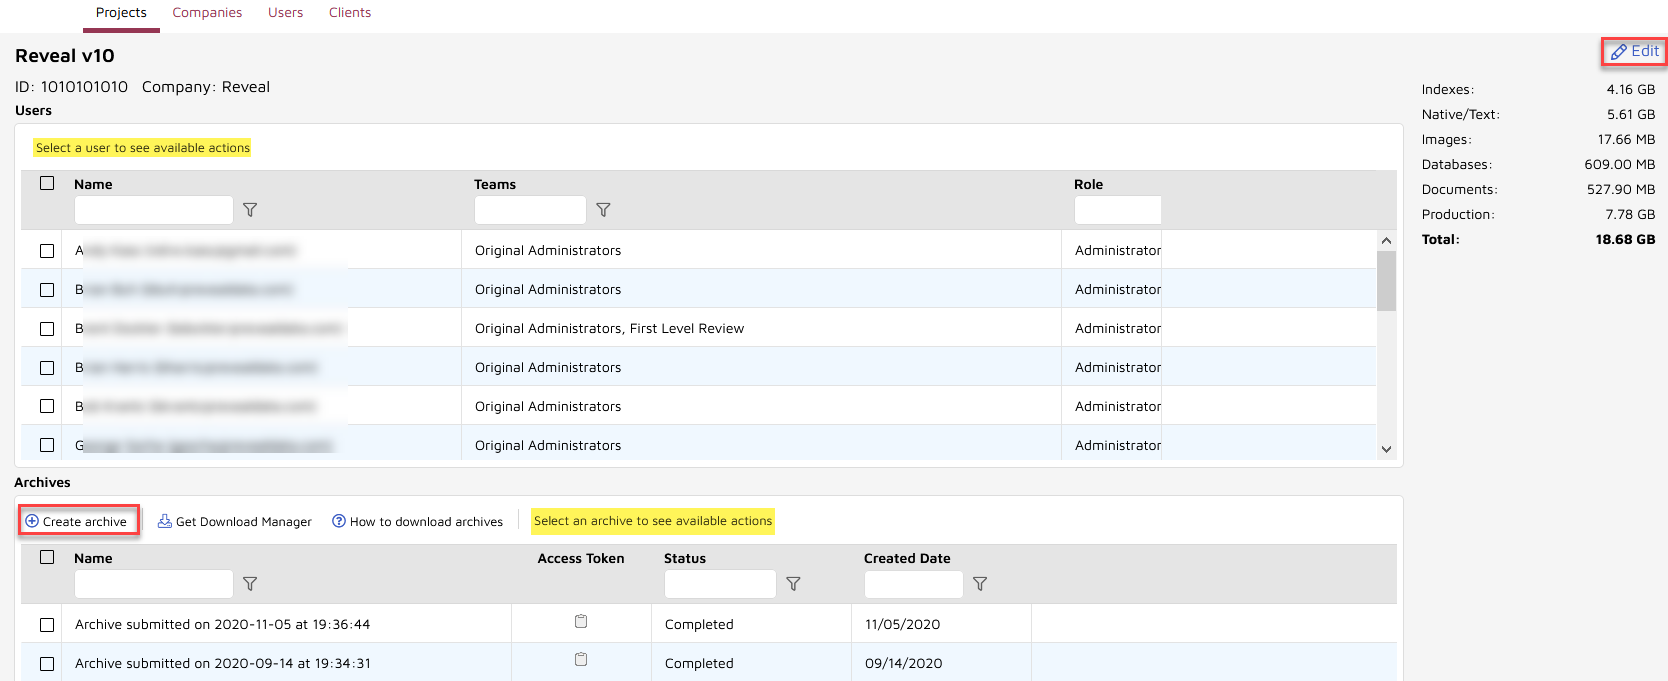
To view and manage a project click on the Project Name in the Projects table.
The project details screen shows
the case name at the top with the Case ID and Company in the header;
all Users assigned to the case with the assigned Team and Role of each;
Archives made, along with a control to Create archive; and
Summary case statistics in the shaded pane to the right.
In this screen the administrator may
select a User or Users for deletion from the project.
create a new archive (see Creating Project Archives for more information).
select an archive for deletion.
click Edit in the upper right corner above the Statistics table to amend security settings, add Users or change their group assignments. See Working with Users for more information.