Server connections
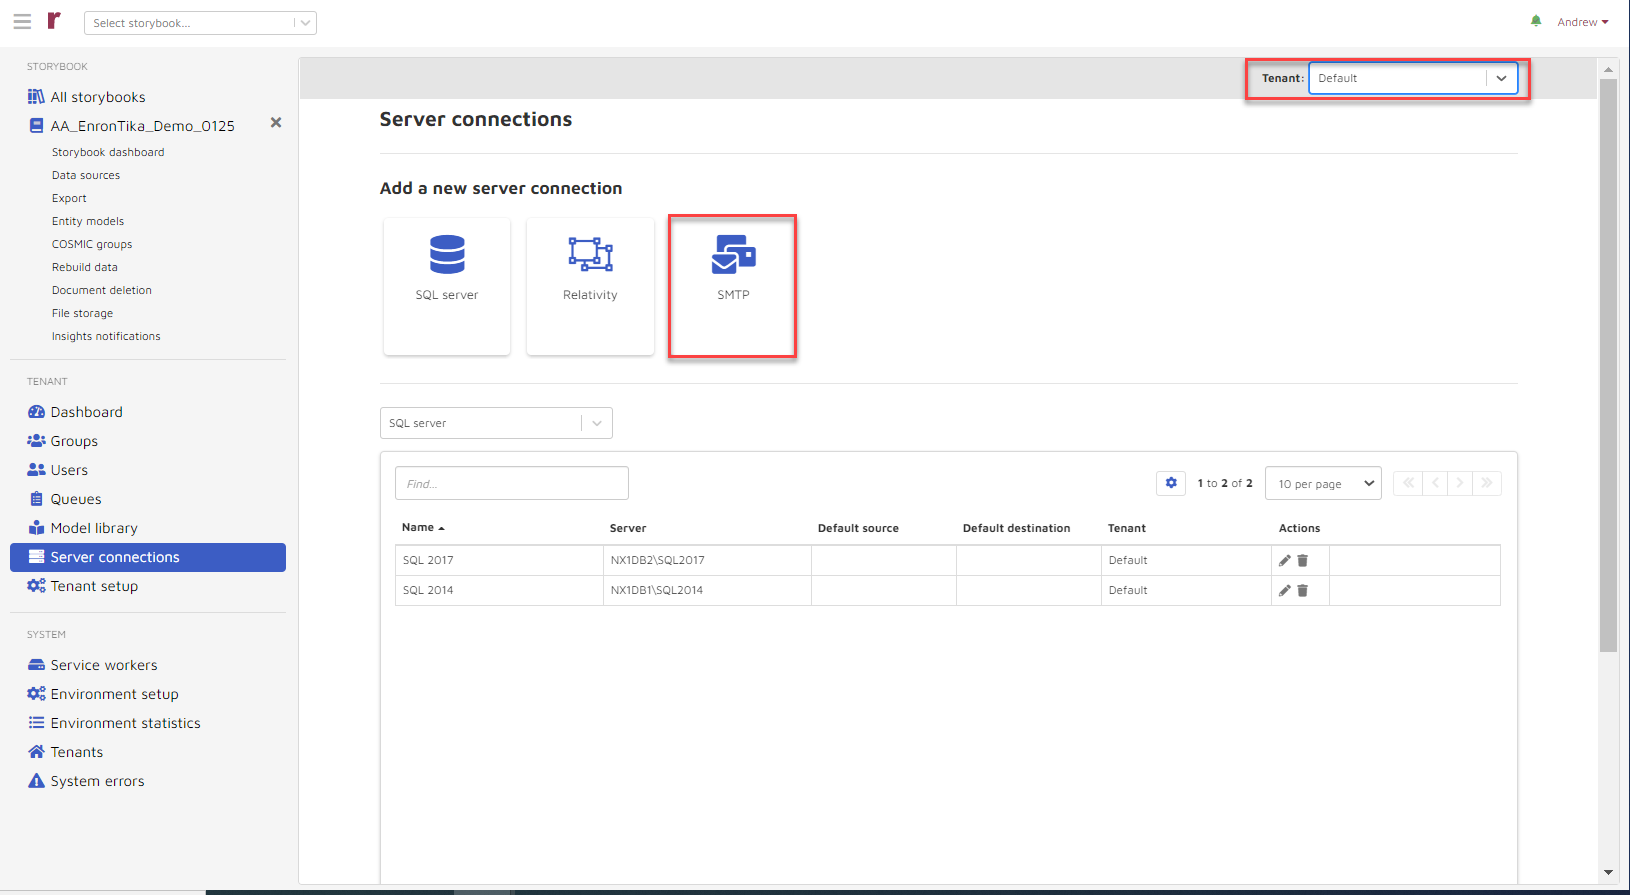
View all server connections. Add, modify or delete server connections. This page is organized by server connection type:
SQL,
Relativity®, or
SMTP.
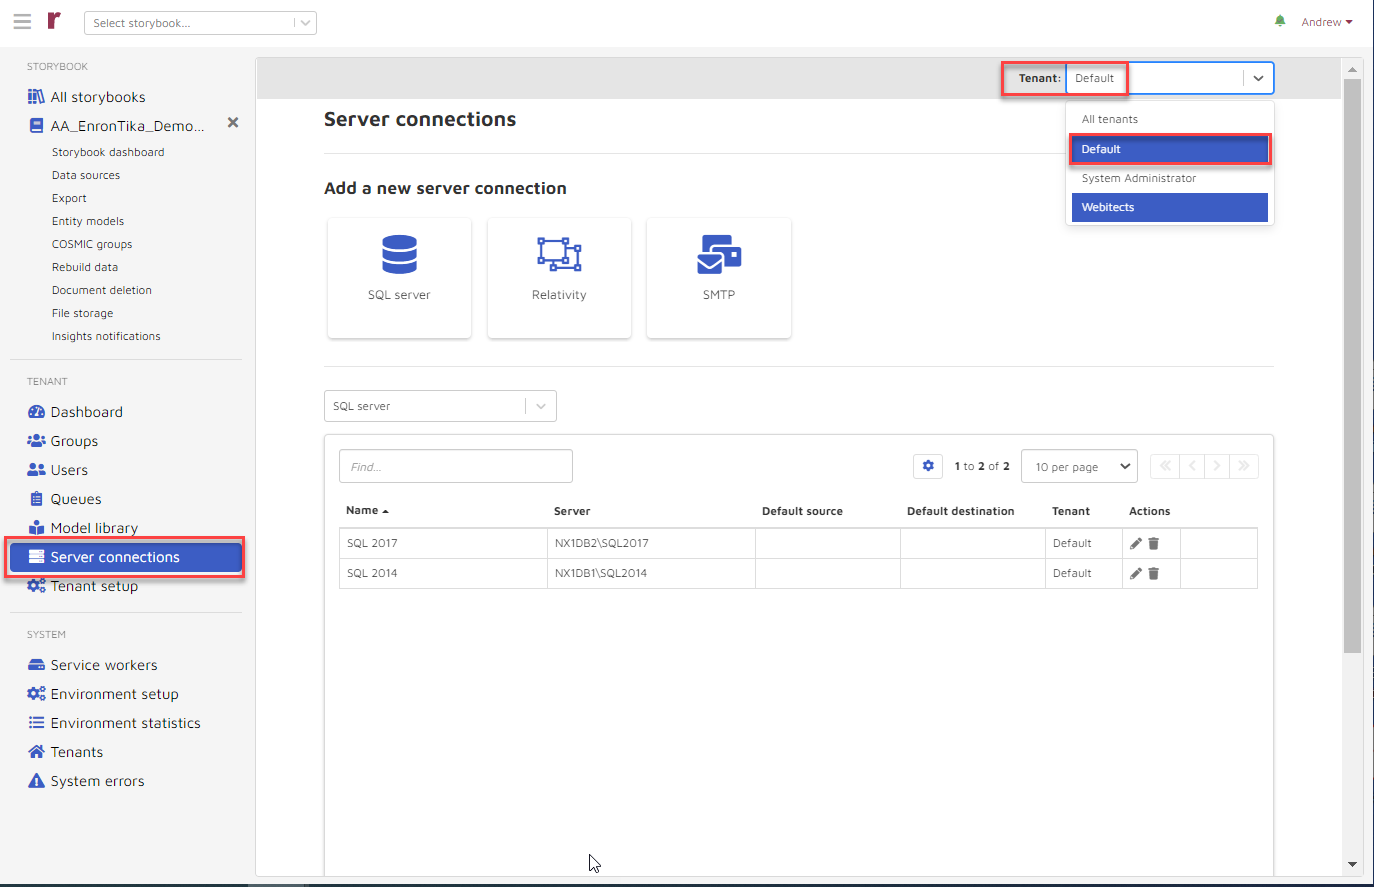
Choose from the dropdown list to access the list of connections belonging to a particular type.
System Administrators should use the Tenant switcher located in the upper righthand corner to verify you are working on the proper tenant.
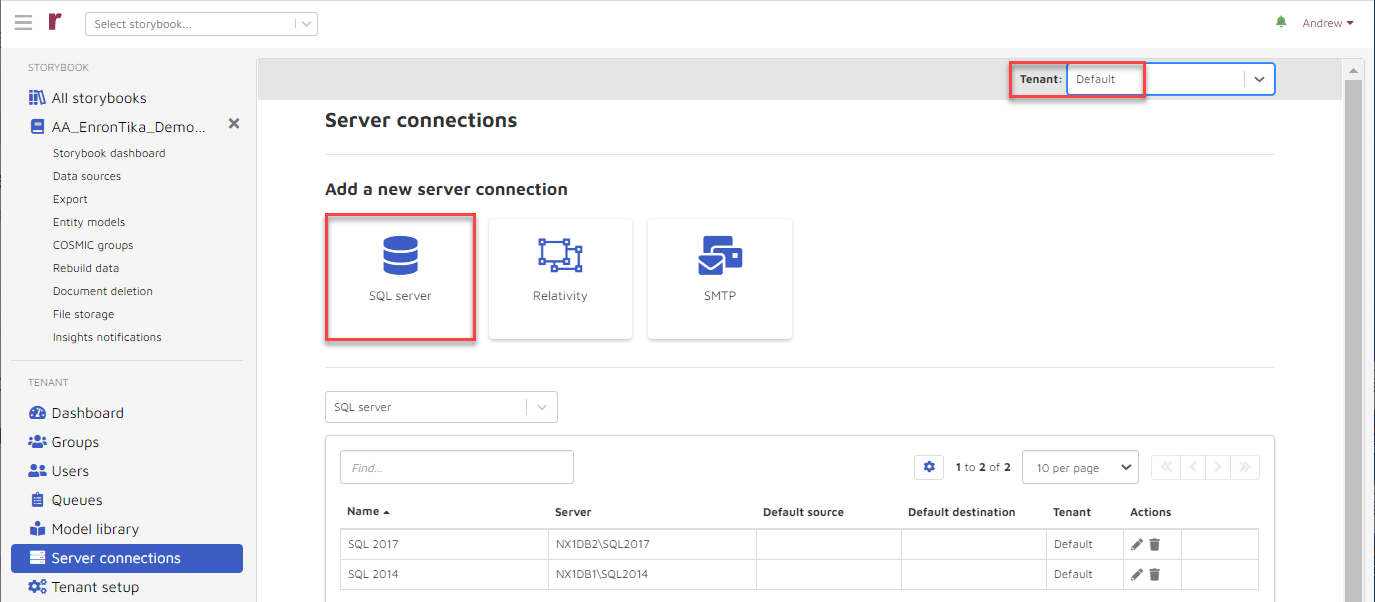
1. Add SQL server connection
Choose the SQL server icon.
The Add SQL Server Connection page appears:
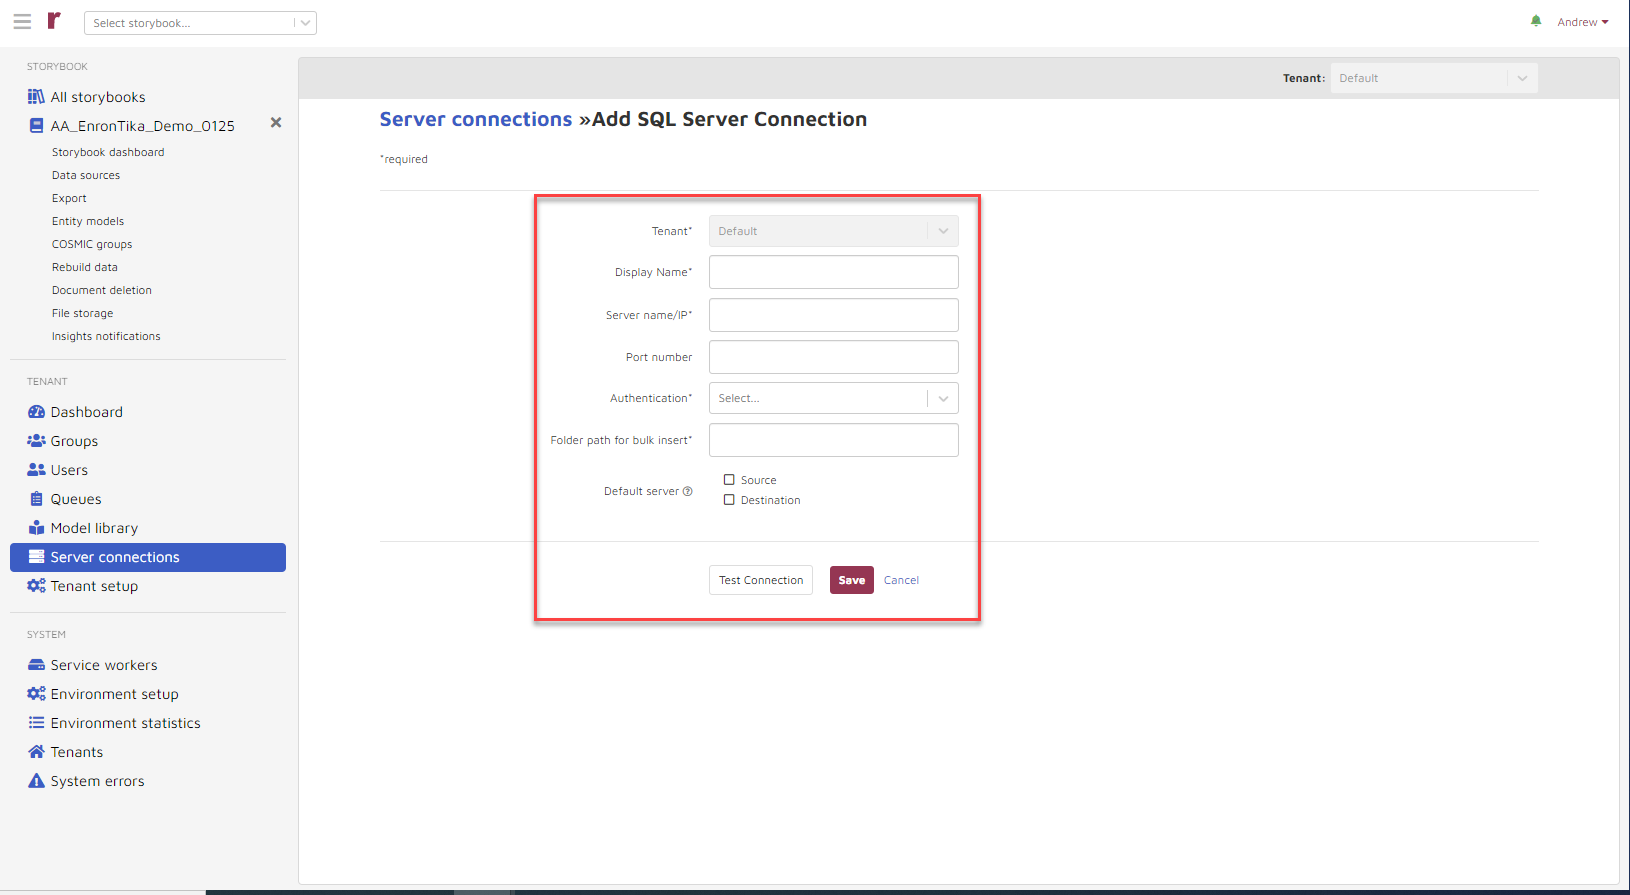
Enter the following:
Display Name (required): An alias for the server.
Server Name/IP (required): Insert server name or IP address.
Port Number: Enter port number.
Authentication (required): If you choose Username and Password they appear as prompts immediately below.
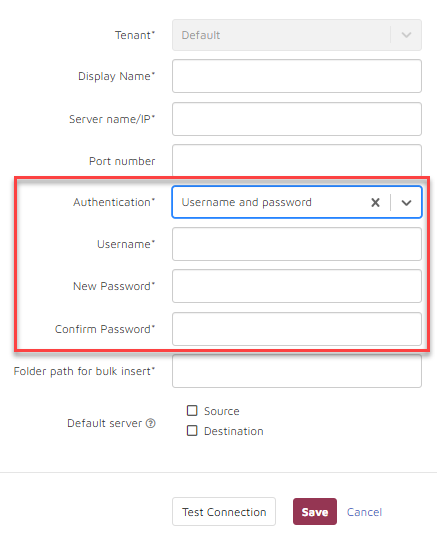
Username (required): Automatically populated with your Reveal AI username.
New Password (required): Automatically populated with your Reveal AI password.
Confirm Password (required): (Passwords can be managed in Google account).
Folder path for bulk insert (conditionally required): Folder path for bulk insert is only required for destination server, see Reveal AI Installation Guide for more details on how to set up bulk insert folder.
Default server: To indicate that this server is a default server, select Source (Reveal AI will read from this server) and/or Destination (Reveal AI will write to this server).
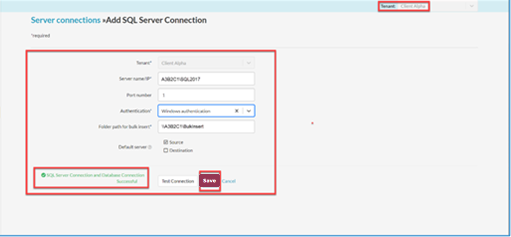
Choose Test Connection and assuming confirmation choose Save.
The connection is established:
(Failure to connect will result in “Unable to connect to SQL SERVER”.)
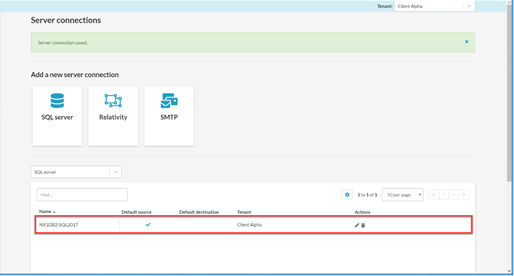
Save: Choose Save and the new SQL connection appears in the SQL Server list.
2. Add Relativity® server connection
Note
For complete description of adding a Relativity® server connection please see Section 4. Integration with 3rd Parties, A. Relativity®, Add Relativity® Server Connection.
3. Add SMTP server connection
SMTP server connections are used to allow email notifications. To set up an SMTP server connection choose the SMTP icon:
The Add SMTP Server Connection page appears:
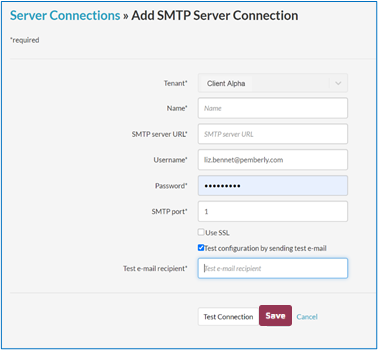
The following information is requested:
Tenant: This automatically populates according to the System Administrator's choice with the “Tenant Switcher”.
Name* (required): The name of the server connection.
SMTP server URL*: (required): The URL of the SMTP server.
Username* (required): Automatically populated with your Reveal AI username.
Password* (required): Automatically populated with your Reveal AI password.
SMTP Port* (required): Use arrows to choose port number.
Use SSL: Check if yes.
Test configuration by sending test e-mail: Check if yes. If checked, the Test e-mail recipient prompt displays.
Test e-mail recipient*: (required when presented)
Test Connection: A failure to connect will result in “Connection is incorrect: [Details].”
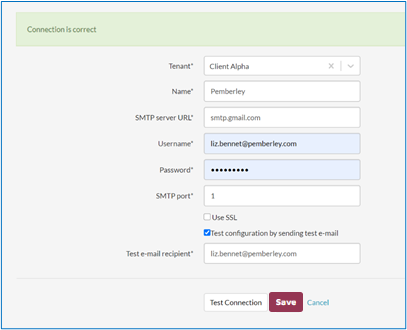
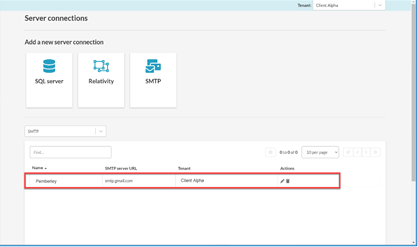
Successful connection will result in “Server connection saved.”
Save: Choose Save and the new SMTP Server Connection will appear on the SMTP list.