Reveal AI 2.90 Upgrade Guide
1. Overview
This document provides step-by-step instructions to upgrade Reveal AI from within v2.0x.
2. Prerequisite
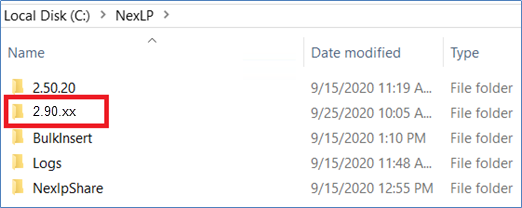
Obtain a copy of the latest Reveal AI 2.90 Installation Package and unzip it to a shared folder accessible by all the servers that use Reveal AI, for example, \\Nexlp_Share\2.90.xx.
Note
This does not have to be the dedicated Reveal AI share but it certainly can be as long as there is enough disc space.
We recommend that you confirm there are valid backups for the Reveal AI Admin database and all Storybook case databases before upgrade.
Large workspaces can take long time to upgrade, especially if you are not yet on v2.21. Confirm with review team before you start upgrading workspaces.
3. Upgrade SQL Databases
Log on to your Reveal AI Processing Server and access the file share location where you deployed the new upgrade package.
Within the local NexLP folder (e.g., C:\NexLP) create a new subfolder with the version number of the latest install package.

Copy the 03.Processing folder from the share and paste it into the local subfolder that you created in the step above.
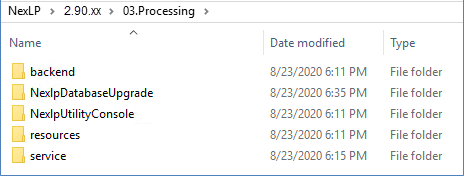
Within 03.Processing\NexlpDatabaseUpgrade, open the NexLP.Upgrade.exe.config file and update the following lines if needed:
ID
Name
Details
1
RootFolder
Points to the folder that contains the update scripts; by default it is “.\UpgradeScripts”
2
IgnoreStorybookIds
ID of story books to ignore, separated by “,” -- for example, “100010,100020”
3
VerboseLogging
Set Yes to indicate a verbose logging
4
ExecutionQueryTimeout
Query execution timeout in Seconds
5
ResultFile
Location of the log file
In the same config file, find the “<ConnectionStrings>” section and edit connection string settings so that the upgrade application can connect to the NexLP Admin database correctly. For example,
<connectionStrings>
<add name="NexLPAdmin" connectionString="Server=localhost;Database=NexLPAdmin;Integrated Security=SSPI;Connection Timeout=120" providerName="System.Data.SqlClient" />
</connectionStrings>
Open a command line window in Admin mode.
Browse to the folder where you extract the files.
Run the following command:
C:\nexlp\2.90.xx\03.Processing\NexlpDatabaseUpgrade\NexLP.Upgrade.exe
After the upgrade finishes, open the result file (you can check the config file to find the location of the result file) and confirm there are no failures during upgrade.

4. Update Processing Server
If you are upgrading from a version below 2.90 you will need to refer to Step 5 of the v2.90 Installation Guide and install a brand-new Processing Service. If you are upgrading from an existing version of 2.90 follow the steps below:
Important
If you are upgrading from a version 2.10 or below and you are processing data from a database not on the Reveal AI SQL Server you will need to make sure that the default SQL port (1433) is open on the Reveal AI Web Server as this server will now be making the call to that database. It will also be authenticated on that SQL Server with the account that is set up to run the Application pool for the NexLP app in IIS.
Log on to your Reveal AI Processing Server and access the file share location where you deployed the new upgrade package.
Within the local NexLP folder (e.g., C:\NexLP) create a new subfolder with the version number of the latest install package.

Copy the 03.Processing folder from the share and paste it in the local folder that you created in the step above.
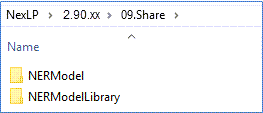
If you are upgrading to v2.90 for the first time, from the 09.Share folder copy the NERModle and NERModelLibrary folders and paste them to your NEXLP_SHARE location. If those files already exist, please override them with the updated version from your 2.90 installation package.
Tip
If you do not know the location of the NEXLP_SHARE folder you can use the following query on the NexLP Admin database in SQL to help find it.
USE [NexlpAdmin]
SELECT * FROM nexlp.nexlpconfiguration
Important
Before installing the new Processing service, following the steps below to remove the old Processing service:
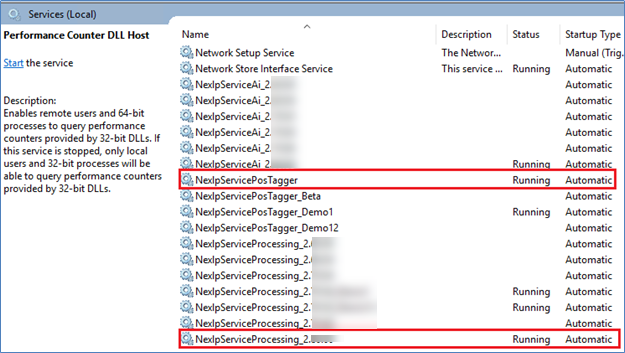
Open the Windows Service tool and Disable and turn off the current running Processing Service.
Open a Windows Command Prompt and browse to the previous Processing service installation folder (for example, “03.Processing\service\ServiceTemplateProduction\NexlpServiceProcessing”).
Run “delete_this_service.bat” to remove the existing service.
Note
You will want to record the service account used for the previous service as you will want to use that account for the new service.
Refer to Step 5 of the v2.90 Installation Guide on how to install the Processing Service.
IMPORTANT: With this version in additional to the NexLP Processing Service you will also be installing a smaller service on the processing machine called NexlpServicePosTagger. These steps start at 5.l of the Installation Guide.
Tip
If you already have a copy of the NexlpServicePosTagger installed from v2.80 you DO NOT need to install a new version of the service for v2.90.
Tip
If you are setting up multiple processing servers it is strongly recommended to create and share the local root folder on each individual server. If you use a common network share on both servers, you will experience a noticeable performance hit while processing in the event you are writing the processing logs over the network share.
Example: if you have the root C:\NexLP on processing server 1 and server 2 make sure the <serviceLogRootFolder> value on each server points to the shared root folder.
5. Update AI Server
If your current AI Service version is different than the one in the install package you will need to reinstall the AI server for v2.90 Refer to Step 6 of the v2.90 installation guide on how to install the COSMIC Service.
Tip
Before installing the new COSMIC service, following the steps below to remove the old COSMIC service:
Open the Windows Service tool and Disable and turn off the current running AI Service.
Open a Windows Command Prompt and browse to the previous COSMIC service installation folder (for example, “C:\nexlp\2.90..xxxx\04.Service\service\ServiceLocal\NexlpServiceAi_2.90.xx”).
Run “delete_this_service.bat” to remove the existing service.
Note
You will want to note the service account used previously for the service as you will need to use that account for the new service.
Log on to your Reveal AI Server and access the file share location where you deployed the new upgrade package.
Within the local NexLP folder (e.g., C:\NexLP) create a new sub folder with the version number of the latest install package.

Copy the 04.Service folder from the share and paste it in the local folder that you created in the step above.
Refer to Step 6 of the v2.90 Installation guide on how to install the COSMIC Service.
6. Update Web Server
For the web server upgrade you will need to update the file paths for the NexLP web applications in IIS on the Web Server for 2.90. Refer to Step 7 of the v2.90 installation guide on how to install Web Server.
Log on to your Reveal AI Web Server and access the file share location where you deployed the new upgrade package.
Within the local NexLP folder (e.g., C:\NexLP) create a new sub folder with the version number of the latest install package.
Copy the 06.Web folder from the share and paste it in the local subfolder that you created in the step above.
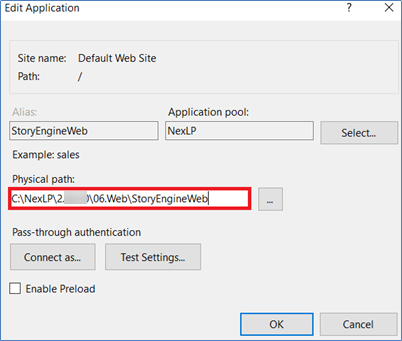
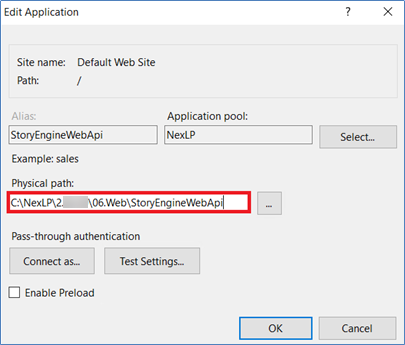
Launch Internet Information Services (IIS) and navigate to your NexLP Applications.
Choose “Basic Settings…” for all 3 NexLP Web Applications.

Update the Physical Path to the new StoryEngineWeb, StoryEngineWebApi and StoryEngineWebClassic folders found in your latest Reveal AI package.

Please refer to Steps 7.2 – 7.5 in the 2.90 Installation guide for how to update the configuration files for the three folders found in the new 06.Web folder.
Tip
Step 7.4.2 is a new step mentioned in the web install.
Important
DO NOT copy and paste the .config files from previous version directly into the latest as additional information has been added.
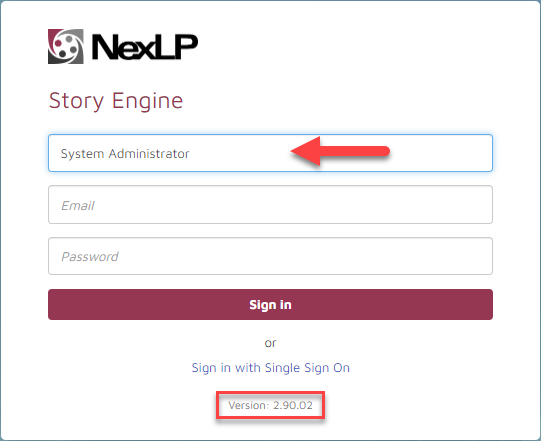
Confirm that the Web upgrade has completed successfully by going to the StoryEngineWeb homepage on the Reveal AI Standalone and verify if the version number under the login page is the same as the web package.
When you log into the Stand Alone for the first time on v2.90 if you are a Reveal AI System Admin will need to enter “System Administrator” as your Tenant Name. Any non-admin users that have not been assigned a Tenant group will use “Default”.
If you would like to set up a Tenant Domain with a DNS record on your Reveal AI web server please refer to Section 8 (Optional) Tenant Domain Setup for Reveal AI Standalone of the v2.90 Installation Guide.
 |
7. Reveal AI Admin Access through Relativity®
With the introduction of Tenants in this version of Reveal AI, if you are upgrading from a version of Reveal AI below v2.90 and have accounts that are admins in Reveal AI you will need to follow the below steps to create an Admin group inside of Relativity® so that when you sign into Reveal AI through Relativity® you maintain your Reveal AI Admin status. If you log in through the stand-alone you will still be a Reveal AI Admin.
You may use this section to allow users in the provided Relativity® group to sign into Reveal AI from Relativity® with a System Administrator account. To set up Third Party System Administrator Access perform the following:
Enter Reveal AI as an admin directly (not by way of Relativity®).
Go to System Administration >> Environment setup >> Third Party System Administrator Access:
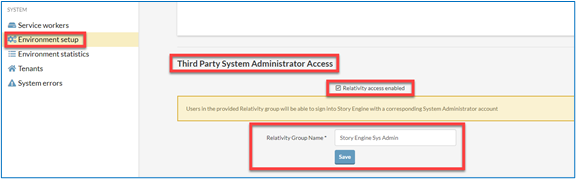
Check the checkbox for Relativity® access enabled.
Designate a Relativity® Group Name that indicates System Admin status such as Reveal AI Sys Admin.
Hit Save.
Enter Relativity®.
Create the identical Relativity® Group Name in Relativity®.
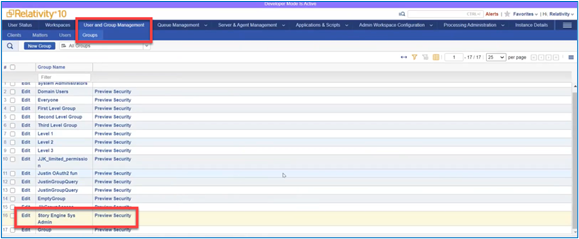
Add those Relativity® users whom you want to enjoy admin status in Reveal AI (including yourself)
to this group.
Sign into a storybook from Relativity®.
Your Reveal AI system admin status verifies success.
8. Relativity® Integration Step
In this version of Reveal AI you will NOT have to drop any .dll files on the Reveal AI web server so long as your version of Relativity® is v9.6 or above. If you are below v9.6 please contact Reveal for steps on a dll drop for your specific lower version.
Important
If you are upgrading from an older version of Reveal AI you will need to install a new ADS Package to your Relativity® environment. For that you will need to navigate to the 05.ADS_Package folder of the installation package and push the Nexlp_RelativityIntegration_2.80.0.9.rap file to your Relativity® workspaces.

If you are using the COSMIC Sync there will also be a new RAP file that you will need to push to your Relativity® library/workspace.
Important
Under the new Relativity® API, Single Sign-On and COSMIC Sync will not be available to users connected to RelativityOne. For these users standard login and “Alternative to Story Engine Home Tab” will be supported, and use of COSMIC monitoring is recommended for tag synchronization.
9. COSMIC/Entity Model Updates
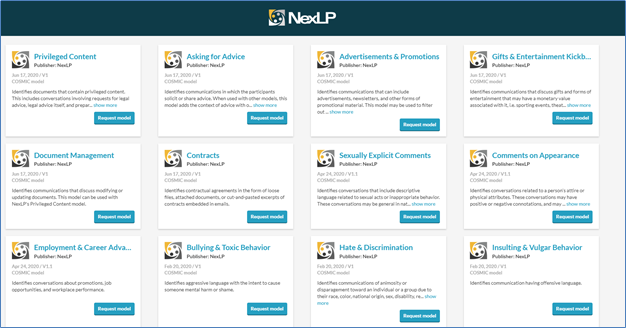
V2.90 now comes out of box with 11+ COSMIC/Entity models that you can upload to your model library. This will require a one-time effort to upload the models from the installation package. Please see Section 12 Uploading Reference Models to Model Library from the Installation Guide.
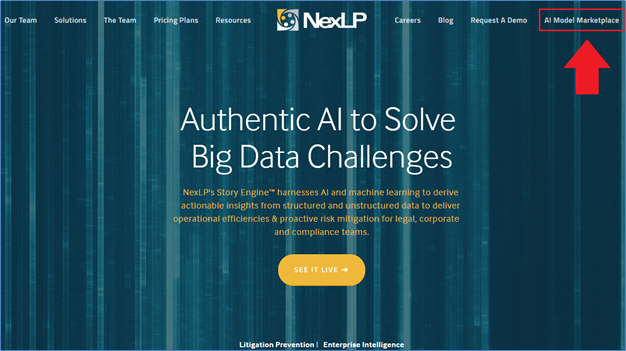
You can also use the Reveal AI AI Model Marketplace to get access to additional models not included in the installation package. For more information on requesting new models please visit https://www.nexlp.com/ and click AI Model Marketplace on the top right corner.