Exporting Productions
Produced documents are exported with associated load files using the Production Export function.
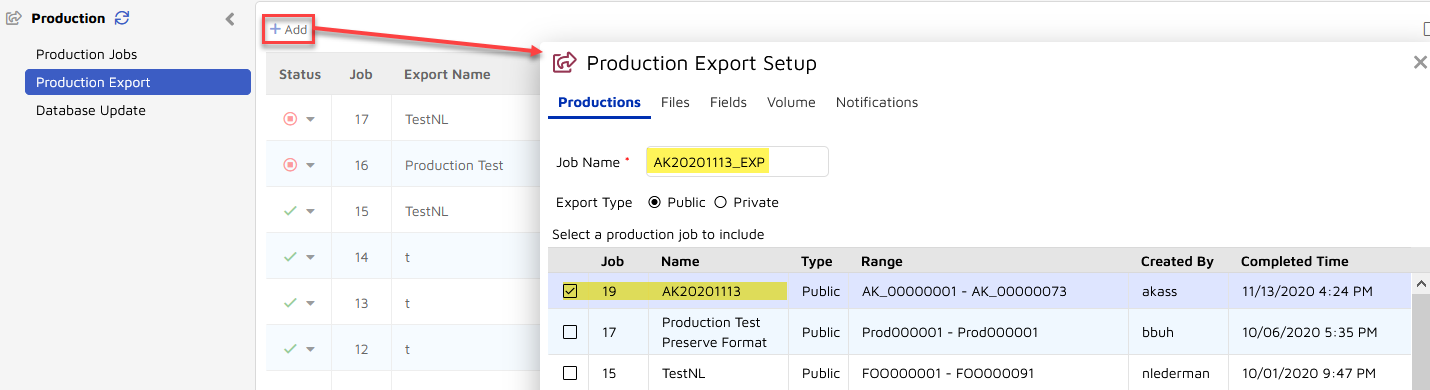
Under Project Admin select Productions and choose Production Exports from the grey side menu.
The Productions Tab
Click the Add button.
The Production Export Setup screen opens to the Productions tab.
Create a Job Name for the Production Export Job.
You may optionally change the Export Type from Public to Private.
Select which Production Job should be exported.
The Files Tab
Set the following:
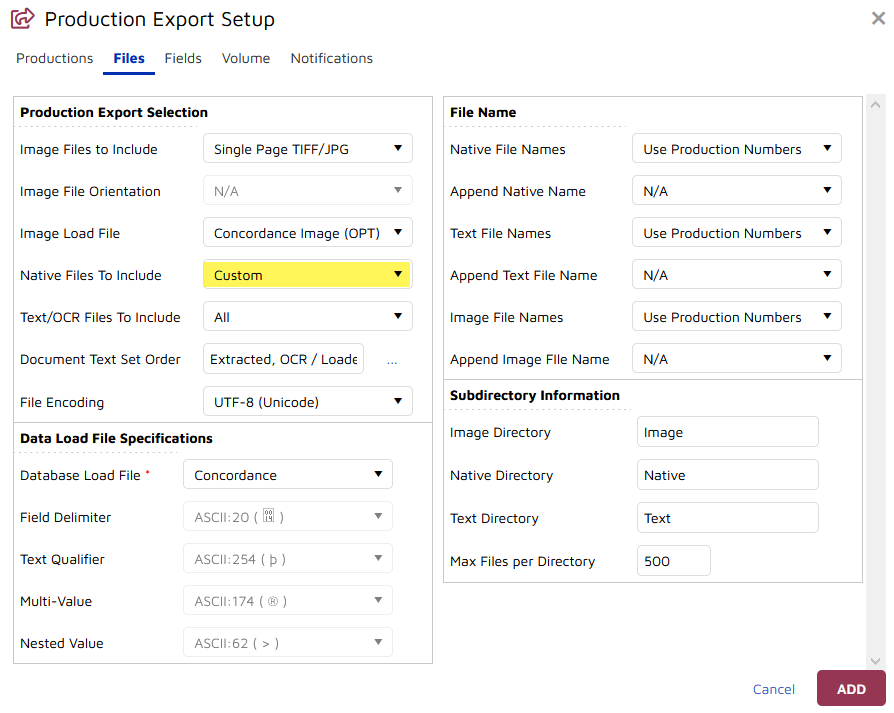
The type of Image Files to Include: Single Page TIFF/JPG, Multipage PDFs (non-searchable) or Searchable Multipage PDFs. This may also be set to None.
Image File Orientation is only settable for PDF generation, as Auto detect, Portrait or Landscape.
Image Load File may be None, Concordance Image (OPT) [default] or IPRO (LFP).
Native Files to Include opens to None, All or Custom. If native files are to be included in the export, select a value from the drop-down list, which is expanded if Custom is selected.
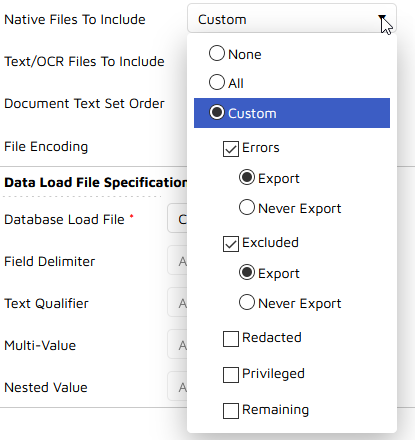
If no native files are to be included, select None.
If all the native files are to be included, select All.
Select Errors if only those files where images could not be created are to be included in the export.
Select Excluded if you wish to only include the native files for those extensions that were excluded from being imaged.
For Redacted and Privilege documents, these commonly are excluded from Native productions. Since the document has been redacted or is privileged, you should not include the raw native file, which would be unredacted. You may include these natives if you are sending a set of unredacted and privileged files to the client or co-counsel for their review.
Note
Files that exist in multiple categories such as Excluded and Privilege or Excluded and Redacted will use the setting in the Redacted/Privilege section to ensure important/privilege data isn’t accidentally included in a production.
Remaining files indicate all the items that were left unaddressed.
If OCR text files are present, there is also an option to handle these files as well.
Set the Text/OCR Files to Include in the same manner as set out for Native Files above.
Set the Document Text Set Order to determine which Text Sets will be examined first for production if Text/OCR Files are to be included.
Select File Encoding from between the default UTF-8 (Unicode) and Western European (Windows). The default supports a broader range of character sets.
Set the Data Load File Specifications to Concordance or adjust if using custom settings.
Set the Native File Names option, commonly Use Production Numbers.
Append Native Name offers the rarely used option to append a selected field value to the native file name.
Set the Text File and Image File Names options, commonly Use Production Numbers.
Append Text File Name and Append Image File Name offer the rarely used option to append a selected field value to each of the text and image file names.
Under Subdirectory Information you may set the name for each of the Native, Image and Text directories in the production export, along with the maximum number of files per folder.
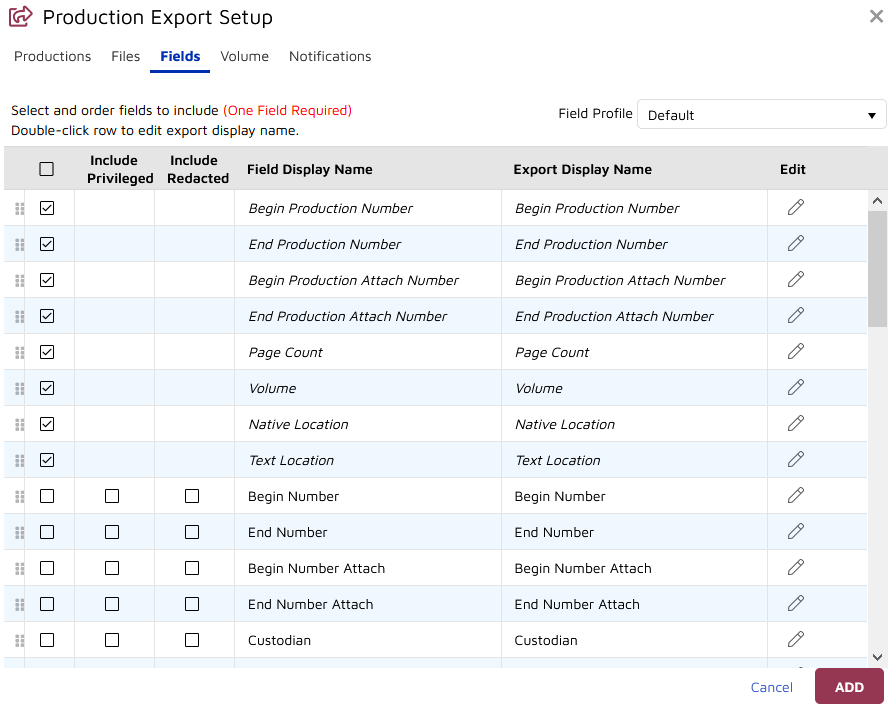
The Fields, Volume, and Notification Tabs
Use the Fields tab to select and order the metadata fields to be included in the export load file. There is an option when exporting the production to exclude some metadata files for Privilege and Redacted documents. Field names can also be changed in the export if desired using Edit.
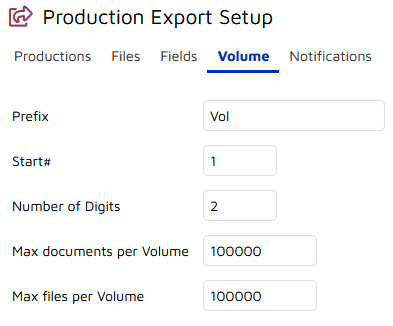
The Volume tab allows you to set the name of the Volume and adjust the number padding if needed.
The Notifications tab allows you to select Users or Team who are notified when the production exports.
Choose Add to complete the Production Export Job creation.
Running the Production Export Job
Once the Production Export Job has been created, it needs to be Started from the Status column dropdown menu for the job on the Production Export Jobs list. Under this menu you may also examine the details of the job and adjust if needed.
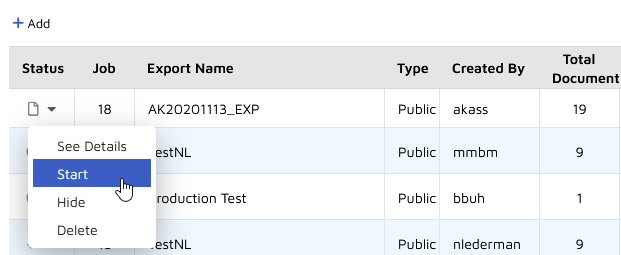
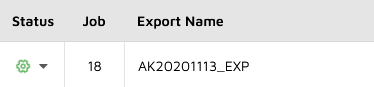
You will be asked for confirmation on start. Once the job is started a grey gear will appear in the Status column. The gear will turn green and spin while the job is processing.
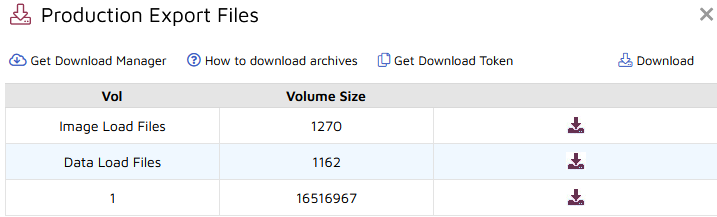
When the job is complete, there is an option to Download the production package. When this is selected, a window opens enabling you to select the download location for the package.
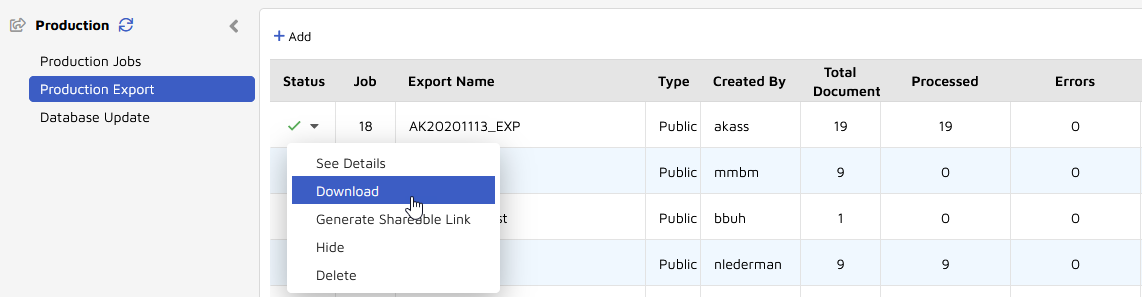
In general, the files may be downloaded directly using the icon at the right of the Production Export Files table. If the export is particularly large, it might require using the Download Manager application.
Users can allow others to download production exports from Reveal even if they are not users of Reveal using the 'Generate Shareable Link to Production Exports' function. This feature is perfect for sharing production exports with opposing counsel. These shareable links are limited in use to seven days.
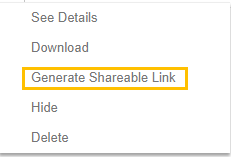
Please be careful when sharing these links as they will allow anyone with the link to download the production export and they cannot be revoked until they expire in seven days.
See Production Database Update for the final step in the production process.