Data sources
The Data sources section allows you to upload, connect, and process documents & tags to your storybook.
Import SQL data to your storybook
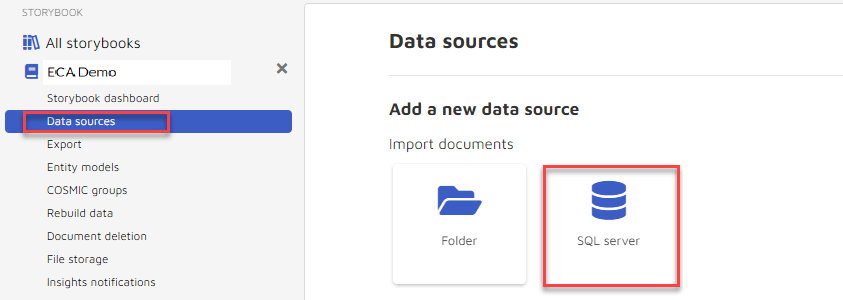
Click the SQL server button to add a SQL connection.
Name your SQL server data source, select the server, database, table, and map fields.
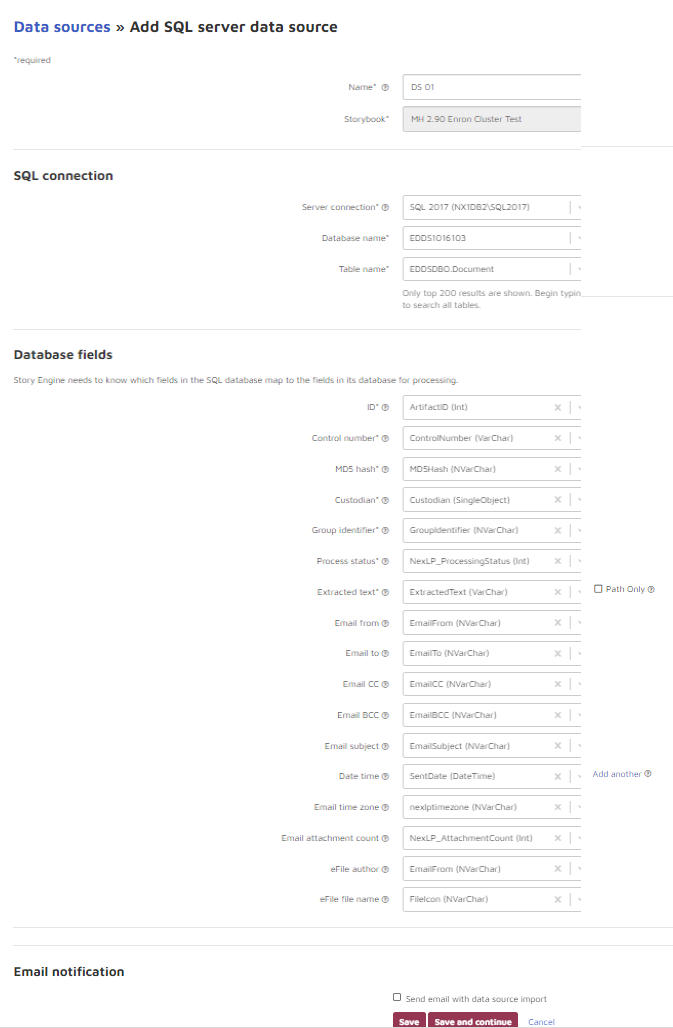
Naming
Name: Give your data source a name that you can use to reference in Reveal AI. We recommend naming it with descriptive information like server, database and table name so you can easily identify it.
SQL mapping: you can map all of your database fields from scratch by selecting “Custom” or save time by loading mapping selections used previously.
SQL connection
Select a source server you wish to read from. If your desired server is not available in the drop-down, go to Server connections under Tenant Settings to connect it.
Choose the database and table from which you wish to read your source data.
Database fields
Before processing begins, a SQL table with required metadata fields must be created. Only fields with compatible field types will be displayed as mapping options. Asterisked fields are required for processing.
ID
Field Name
Field Type
Field description
1
Id*
Number
Numeric identifier of the document. For Relativity®, use ArtifactID
2
Control Number*
Text
Text identifier of the document
3
Custodian*
Text
Name of the custodian. If unavailable, processing will default empty values to “Empty_Custodian”
4
MD5 Hash*
Text
MD5Hash value, default to Control Number if empty
5
Group Identifier*
Text
Used to group email and attachments together; default to Control Number if empty. Notice for parent, the Group Identifier must be equal to the Control Number
6
Process Status*
Number
Indicate Reveal AI processing status
7
Extracted Text*
Text
Path to the text file exported, or text content itself
8
Email From
Text
Field only relevant to emails
9
Email To
Text
Field only relevant to emails
10
Email CC
Text
Field only relevant to emails
11
Email BCC
Text
Field only relevant to emails
12
Email Subject
Text
Field only relevant to emails
13
Primary Date Time
DateTime
Date and Time the email was sent, or last modified date time for attachments & e-files. It is important to include the “Time” part for this field.
14
Email Time zone
Text
The time zone with which the document should be processed. Most common values: EST/CST/PST/GMT
15
Email Attachment Count
Number
Field only relevant to emails. Number of attachments the email has.
16
eFile Author
Text
Last Author of the efile or attachment, if it exists
17
eFile Filename
Text
Filename of the efile or attachments
The Processing data settings page shows you the steps the system will take once processing begins. There are several settings associated with the computer-generated content detection, ingestion, natural language pipeline and pattern detection steps that you may modify. You may also modify the processing XML to include any custom settings that may be desired.
An Email notification option has been added, where if checked all data exports will automatically trigger a notification.
Note
If you are processing a Relativity® workspace, the Reveal AI ADS package will automatically create a “NexLPProcessingStatus” field in the workspace. Before processing data, update Process Status field to 0 for all documents to be processed. For a list of all possible values for this field, refer to Appendix A. Make sure that the processing status field value for all documents that do not need to be processed has a Null value or a value greater than 5. If there are any records with processing status of 4, reset their processing status to 0. Process Data with any combination of entity models including the multiple entity Standard Model or any available from the Model library.
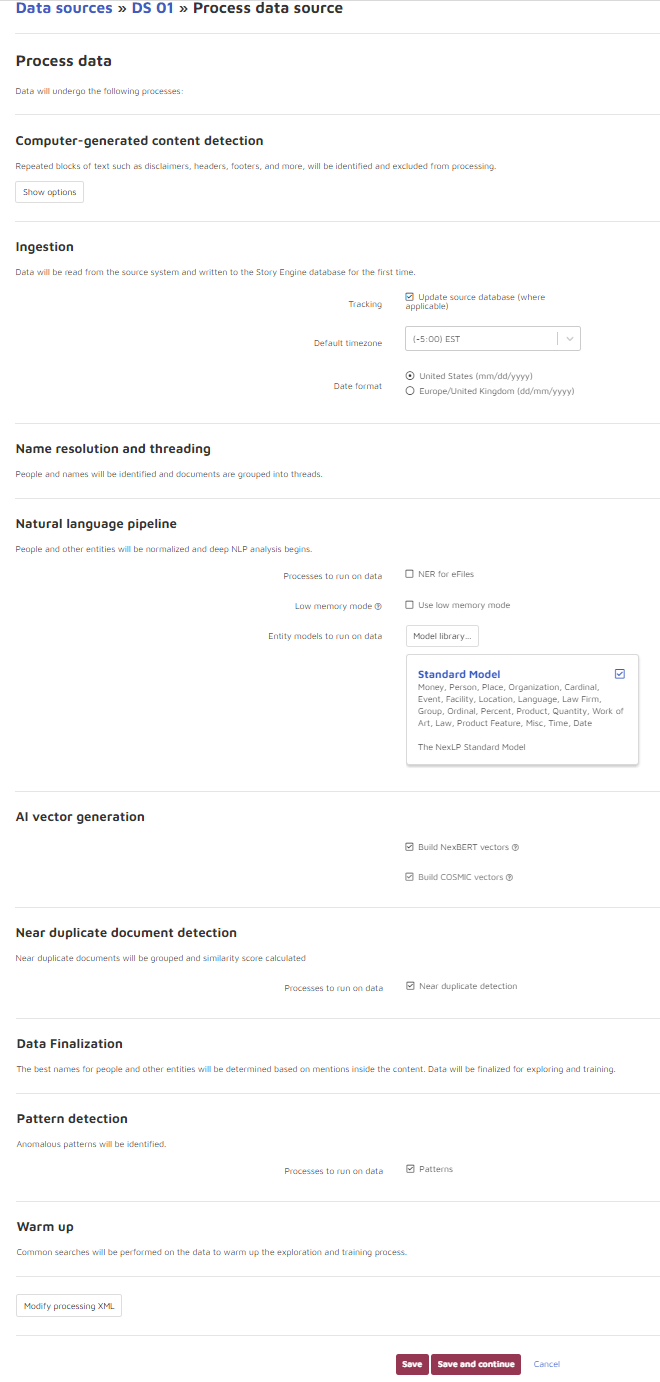
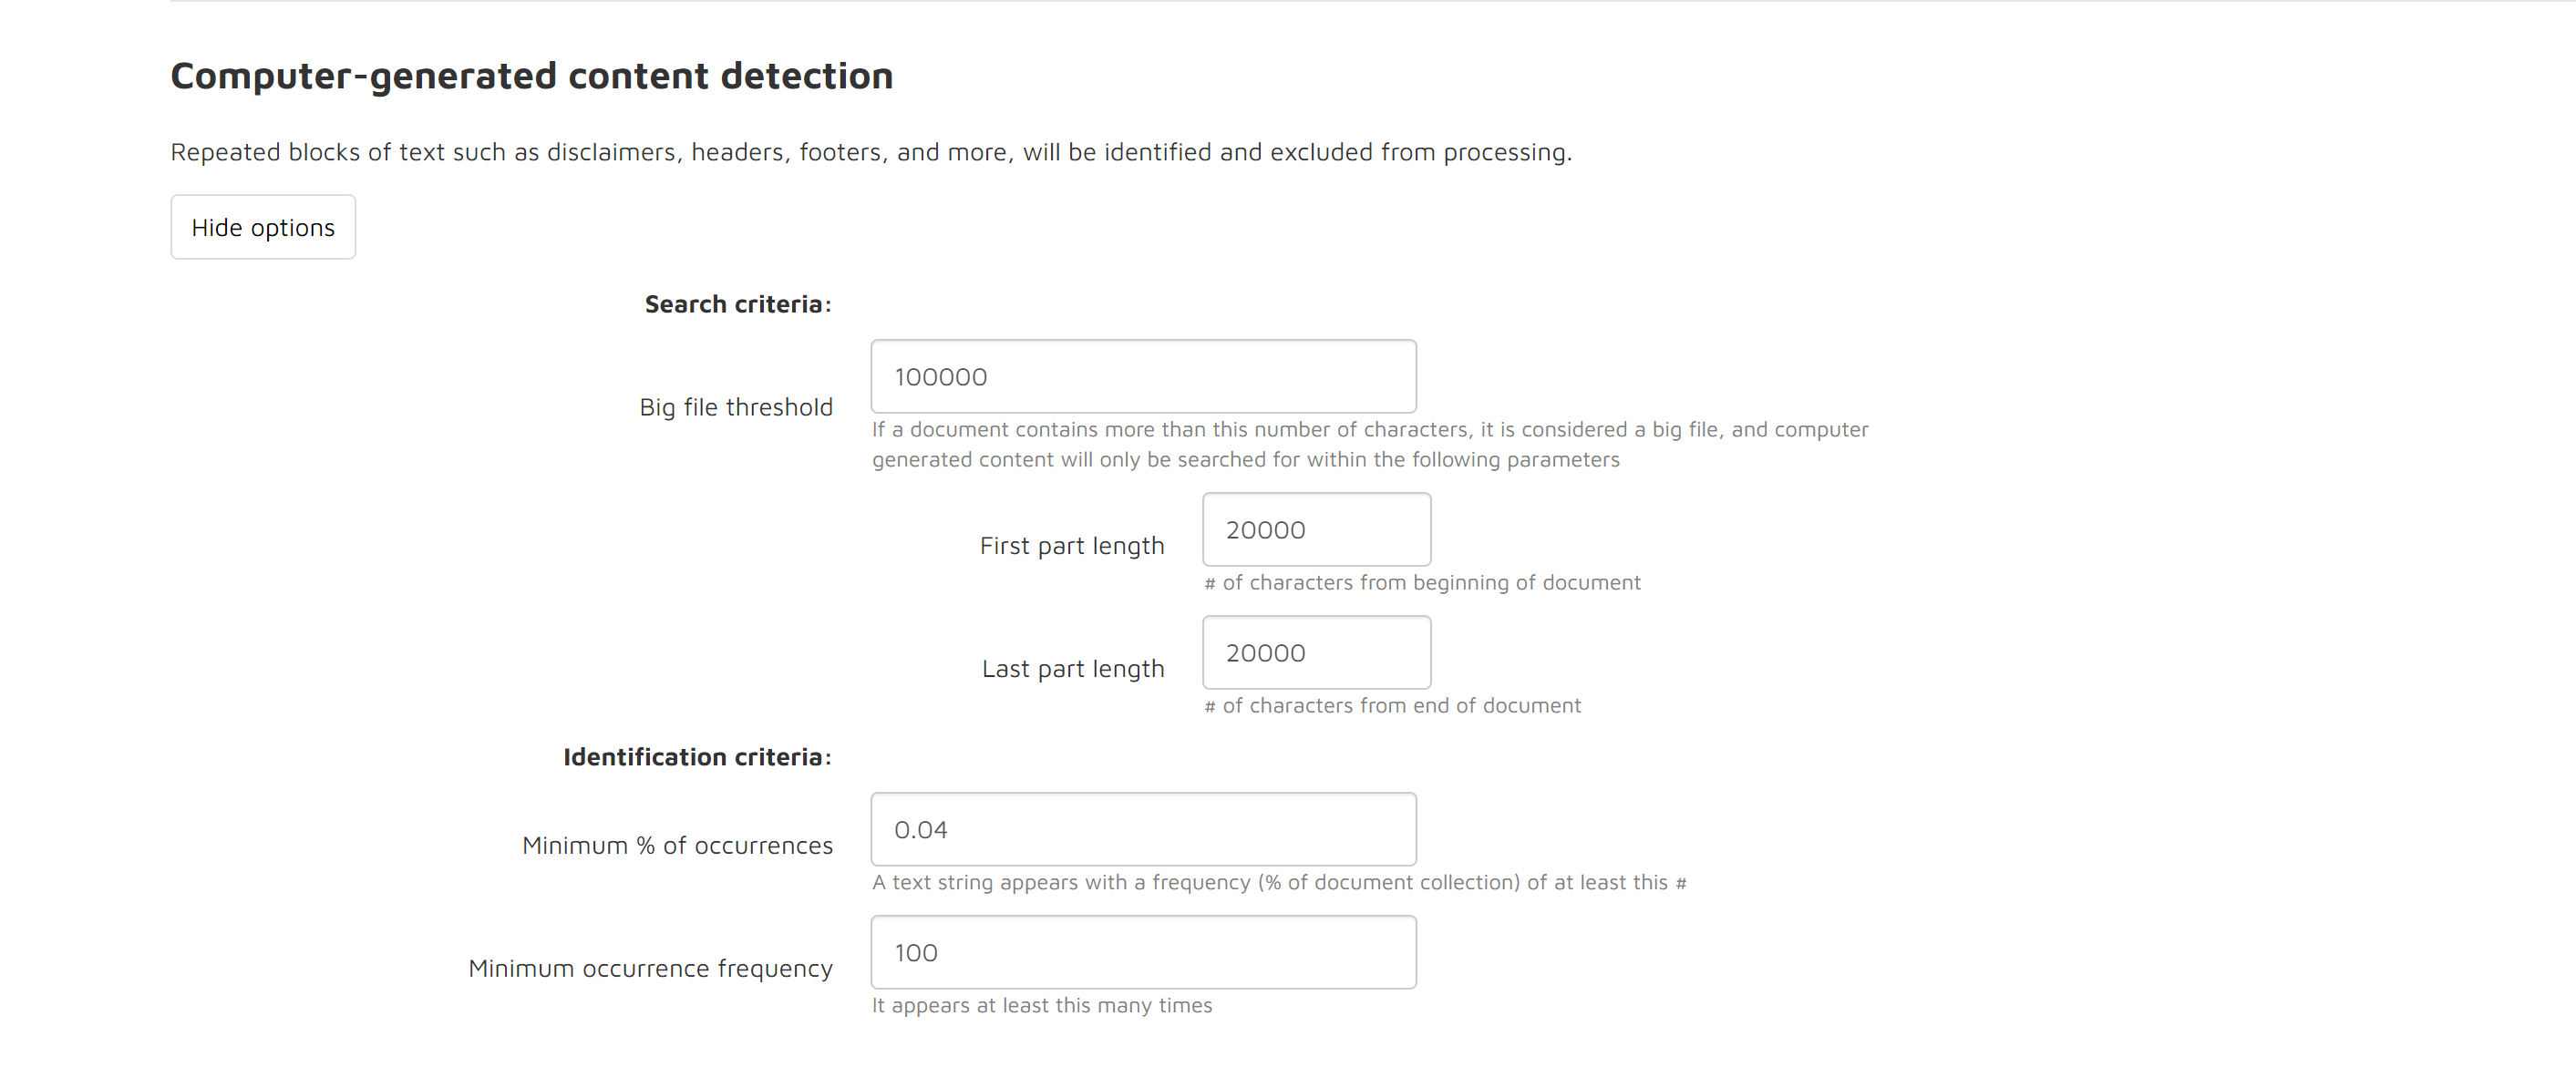
Computer-generated Content Detection: click the Show options button to view and set options for computer-generated content detection:

Under Ingestion:
Default Time zone: The “Default time zone” option tells Reveal AI which time zone to use when processing email text if the Time Zone information is missing in the header lines.
Date Format: The system will prioritize processing using either UK or US date formats based on user selection for this option.
Under Natural language pipeline:
NER for eFiles: By default, Reveal AI only extracts Entities for emails. The “NER for eFiles” option allows user to extract Entities from loose files and attachments. Notice this could increase time needed for processing.
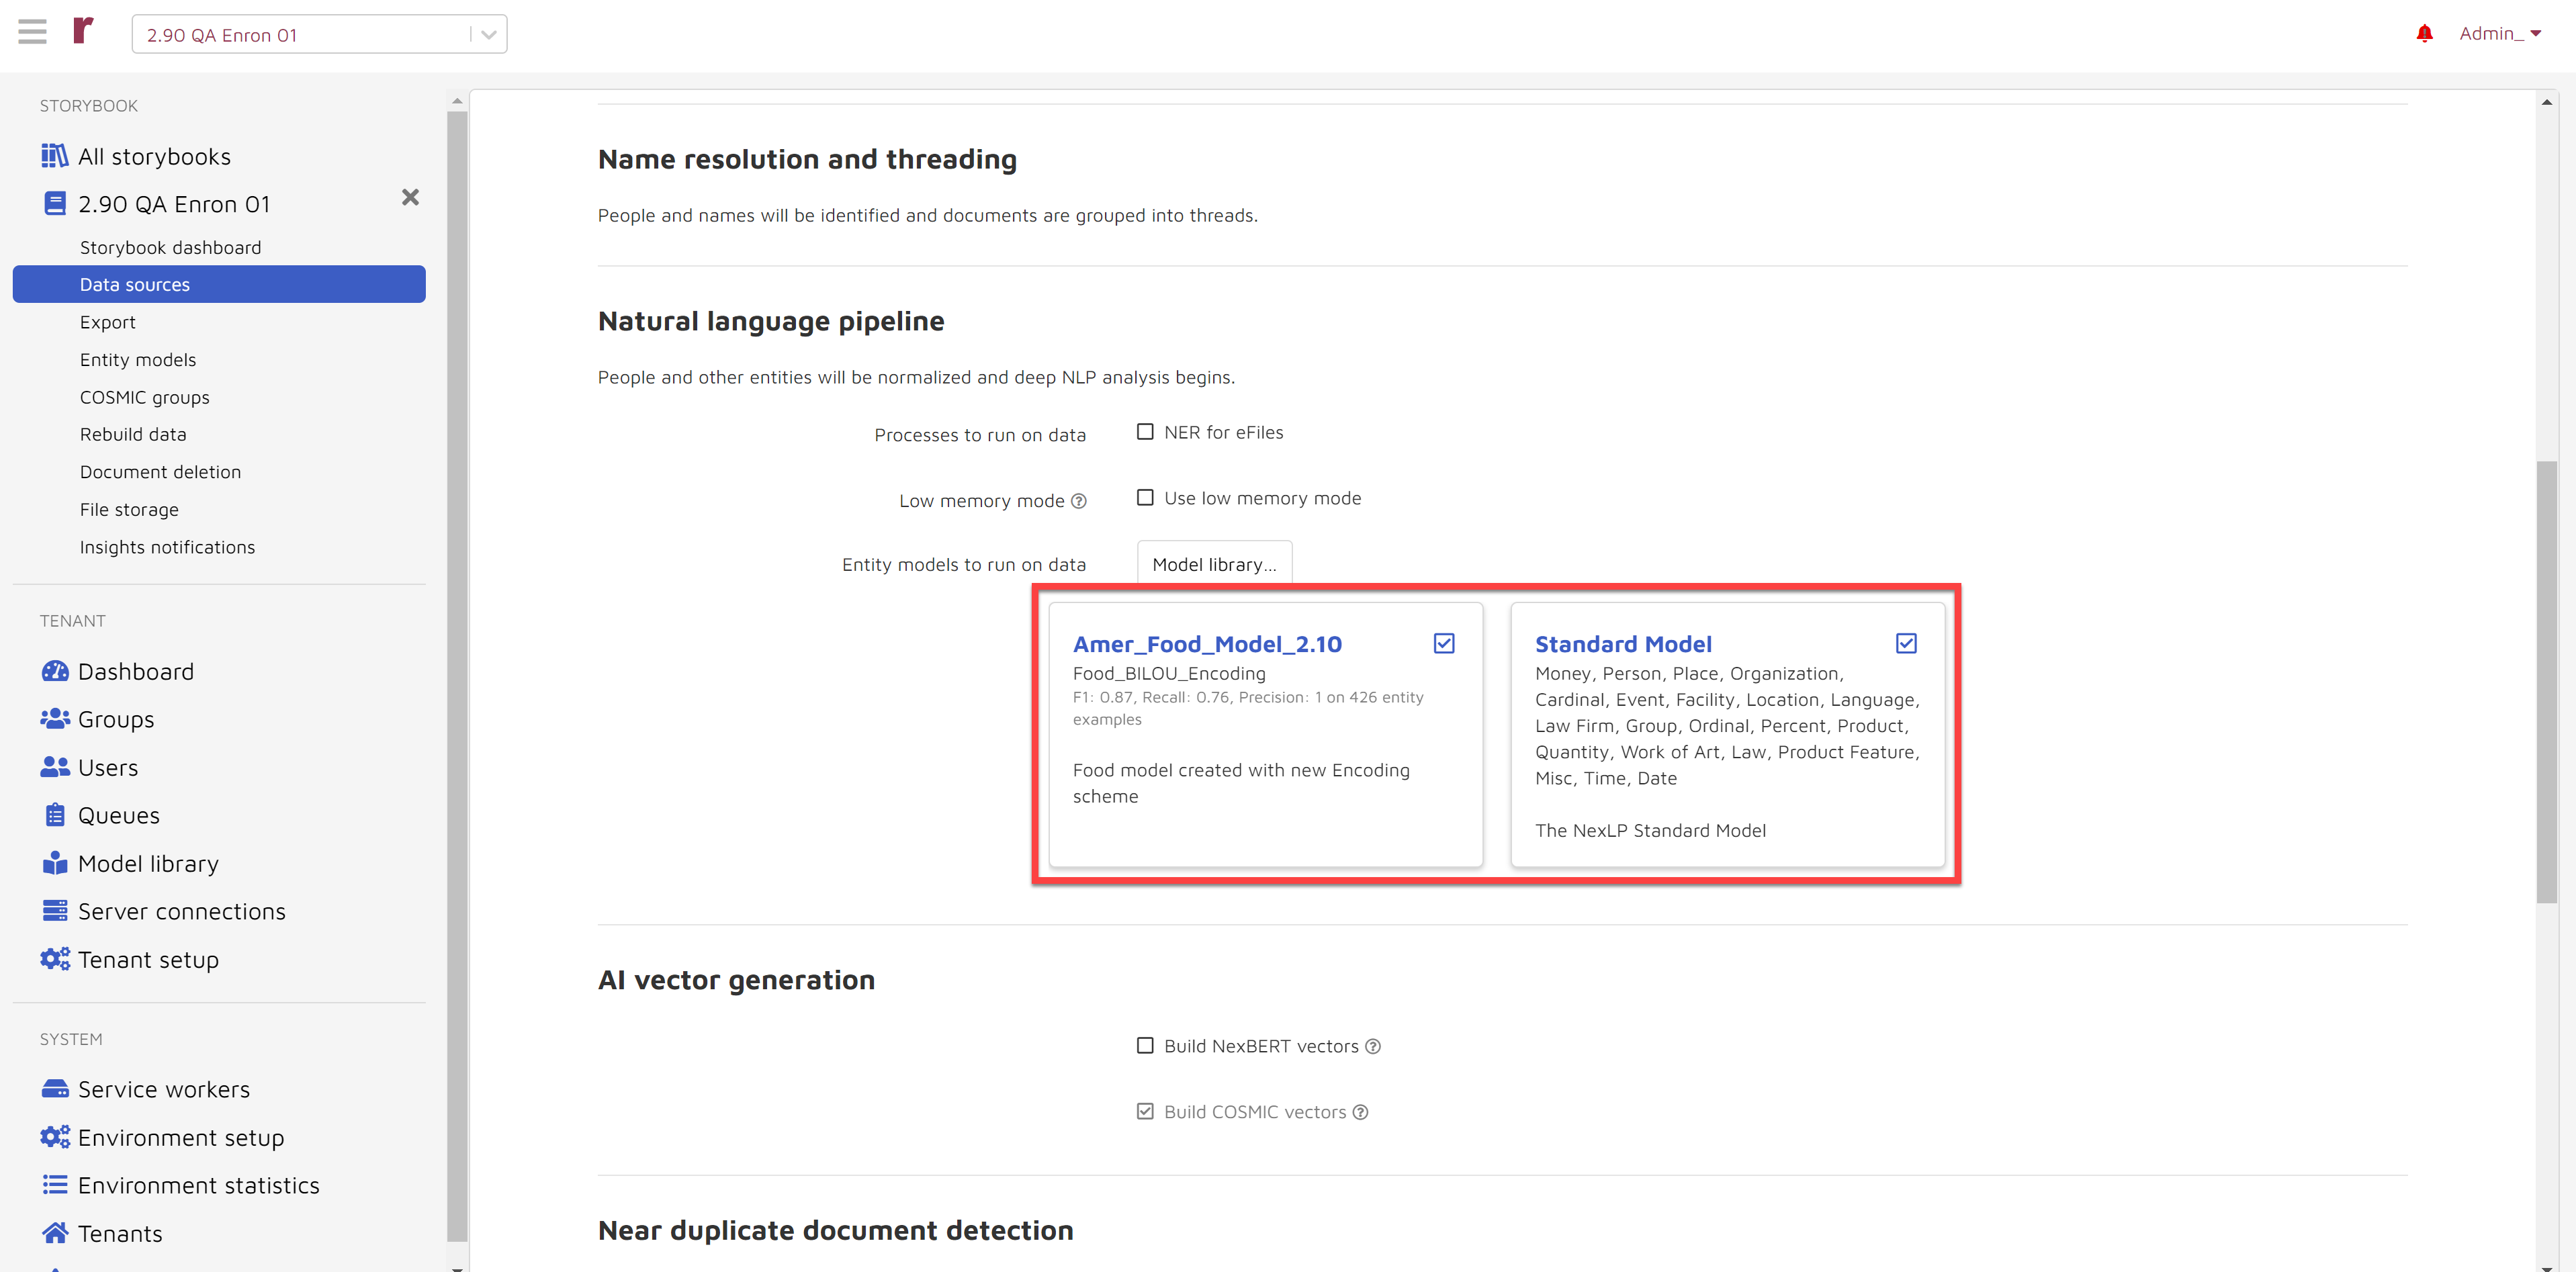
Entity models to run on data: Any models may appear by default according to your configuration. You may turn any model off by unchecking the associated checkbox. By pressing the Model library button you can view the list of additional available models as shown below. You may run any combination of models or none at all.
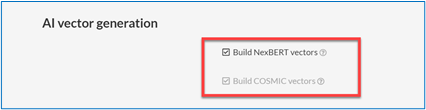
Under AI vector generation:
AI vector generation: By default you will build COSMIC vectors. You may optionally decide to build NexBERT vectors which is required if you are going to use NexBERT models.
Under Near duplicate document detection:
Check the Near duplicate detection box to run the process Near duplicate documents will be grouped and similarity scores calculated.
Under Pattern detection:
Patterns: By default, Reveal AI processes Patterns. If Pattern Detection is not required, uncheck the “Patterns” checkbox.
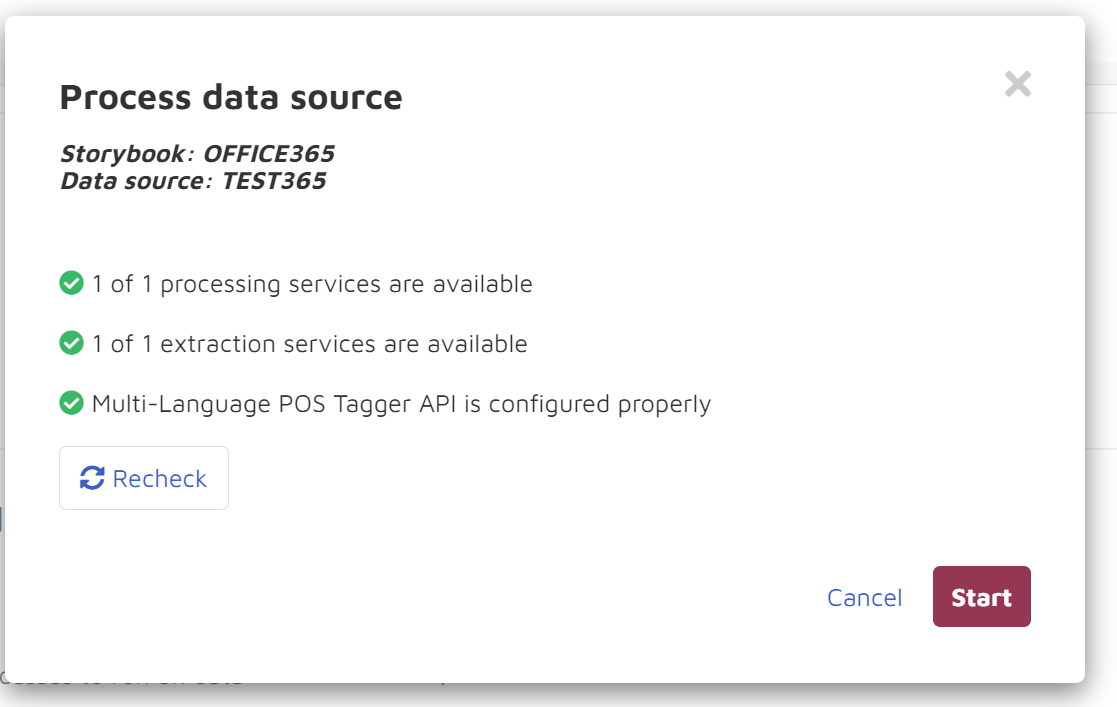
Before kicking off processing, the system will confirm the number of documents you will be processing and undergo final pre-flight checks to ensure the data is in good shape to process.
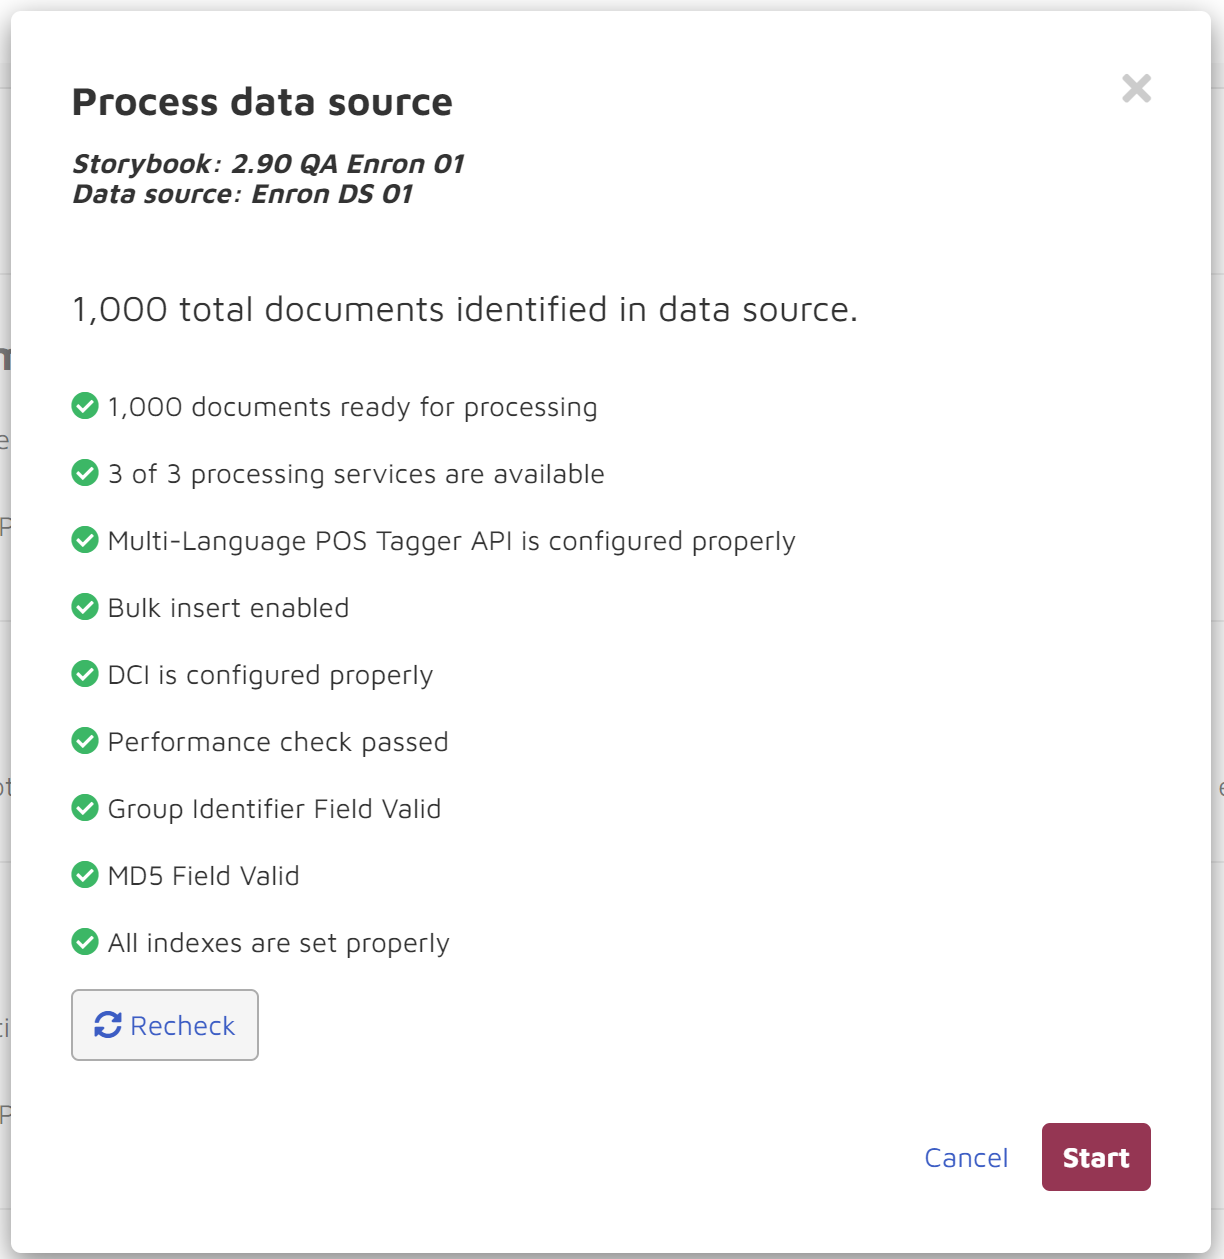
If your data isn’t set up correctly you may get a warning in this screen.
Note
Processing will kick off regardless of any warnings.
 There are no documents ready for processing
This is the number of documents with a process status=0. If this is not the number you were expecting, please check your data source and update the process status field.
0 of X processing services are available
Your processing sevice is stopped. If you click Start your processing job will be added to the queue, but the processing service will need to be launched before this one begins.
No service found with POS Tagger API configured
Your POS Tagger sevice is stopped. If you click Start, your processing job will be added to the queue, but the POS Tagger service will need to be launched before this one begins.
No service found with NER configured
This data source was configured to run with entity extraction but no service was found with Named-Entity Recognition (NER) configured. It is recommended that this be configured to ensure actual results.
No service found with DCI configured
This data source was configured to run with dataless classification but no service was found with DCI configured. It is recommended that this be configured to ensure actual results.
Documents may not have attachments
Column “Groupidentifier” in Table “EDDSDBO.Document” of Database “EDDS1015555_Test” contains at least one blank or null value. Column “Groupidentifier” values will be replaced with values from Column “ControlNumber” for rows where this occurs. When this occurs, documents will not have any associated attachments.
Documents may not have valid md5 value
Column “MD5Hash” in Table “EDDSDBO.Document” of Database “EDDS1015555_Test” contains at least one blank or null value. Column “MD5Hash” values will be replaced with values from Column “ControlNumber” for rows where this occurs.
Documents may not have some necessary indexes
Table “EDDSDBO.Document” of Database “EDDS1015555_Test” does not have an index which contains the column Column””.
Create Missing Index
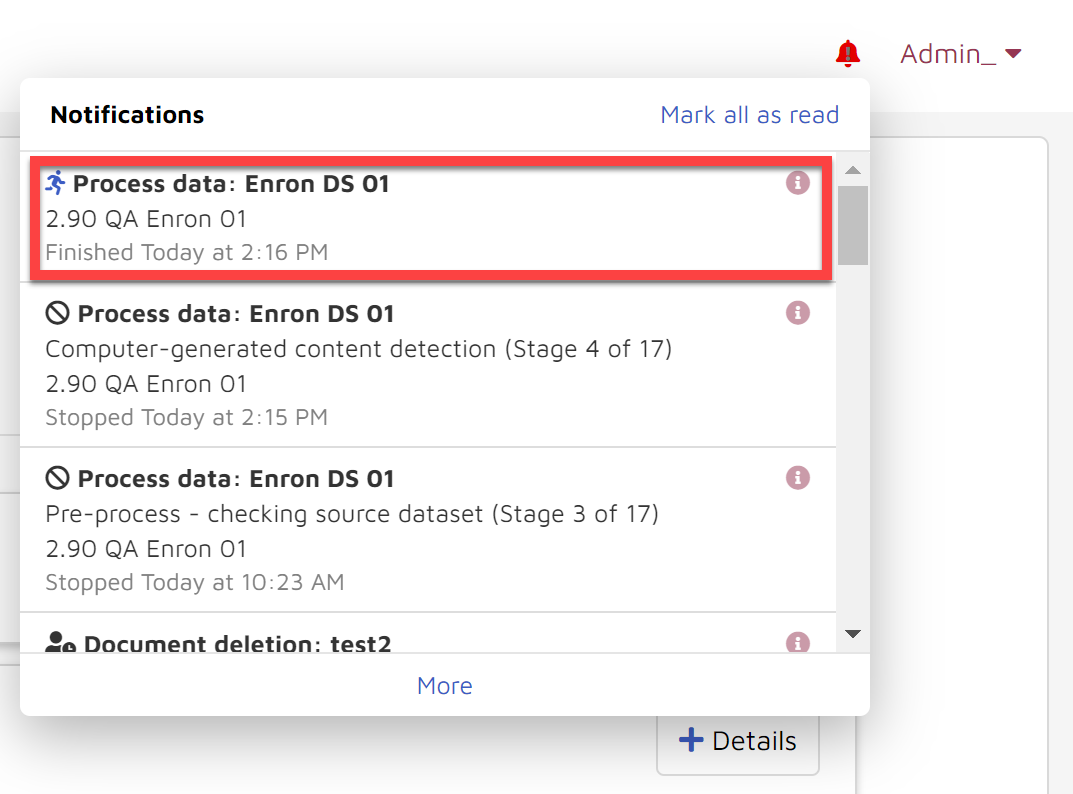
Once you click the Start button processing will kick off immediately. You will be able to check the status of processing in the Notifications center and/or storybook dashboard. There will be a square STOP button to the right of the Notification entry until processing is completed.
Notifications center:
Storybook dashboard view
If you decide to click the Stop button while data is processing, your progress will be saved. You can resume by going to the Data sources page and clicking the triangle icon under the “Process” column as shown below.

Import documents from Relativity®
Computer-generated Content Detection: Click the Show options button to view and set options for computer-generated content detection:
Under Ingestion:
Default Time zone: The “Default time zone” option tells Reveal AI which time zone to use when processing email text if the Time Zone information is missing in the header lines.
Date Format: The system will prioritize processing using either UK or US date formats based on user selection for this option.
Under Natural language pipeline:
NER for eFiles: By default, Reveal AI only extracts Entities for emails. The “NER for eFiles” option allows user to extract Entities from loose files and attachments. Notice this could increase time needed for processing.
Entity models to run on data: Any models may appear by default according to your configuration. You may turn any model off by unchecking the associated checkbox. By pressing the Model library button you can view the list of additional available models as shown below. You may run any combination of models or none at all.

Under AI vector generation:
AI vector generation: By default you will build COSMIC vectors. You may optionally decide to build NexBERT vectors which is required if you are going to use NexBERT models.
Under Pattern detection:
Patterns: By default, Reveal AI processes Patterns. If Pattern Detection is not required, uncheck the “Patterns” checkbox.
Before kicking off processing the system will confirm the number of documents you will be processing, and undergo final pre-flight checks to ensure the data is in good shape to process.
If your data isn’t set up correctly you may get a warning in this screen.
Note
Processing will kick off regardless of any warnings.
There are no documents ready for processing
This is the number of documents with a process status=0. If this is not the number you were expecting, please check your data source and update the process status field.
0 of X processing services are available
Your processing sevice is stopped. If you click Start your processing job will be added to the queue, but the processing service will need to be launched before this one begins.
No service found with POS Tagger API configured
Your POS Tagger sevice is stopped. If you click Start, your processing job will be added to the queue, but the POS Tagger service will need to be launched before this one begins.
No service found with NER configured
This data source was configured to run with entity extraction but no service was found with Named-Entity Recognition (NER) configured. It is recommended that this be configured to ensure actual results.
No service found with DCI configured
This data source was configured to run with dataless classification but no service was found with DCI configured. It is recommended that this be configured to ensure actual results.
Documents may not have attachments
Column “Groupidentifier” in Table “EDDSDBO.Document” of Database “EDDS1015555_Test” contains at least one blank or null value. Column “Groupidentifier” values will be replaced with values from Column “ControlNumber” for rows where this occurs. When this occurs, documents will not have any associated attachments.
Documents may not have valid md5 value
Column “MD5Hash” in Table “EDDSDBO.Document” of Database “EDDS1015555_Test” contains at least one blank or null value. Column “MD5Hash” values will be replaced with values from Column “ControlNumber” for rows where this occurs.
Documents may not have some necessary indexes
Table “EDDSDBO.Document” of Database “EDDS1015555_Test” does not have an index which contains the column Column””.
Create Missing Index
Once you click the start button, processing will kick off immediately. You will be able to check the status of processing in the notification center and/or storybook dashboard.
Notifications center:

Storybook dashboard view
If you decide to click the Stop button while data is processing, your progress will be saved. You can resume by going to the Data sources page and clicking the triangle icon under the “Process” column as shown below.

Please see Section 4. Integration with 3rd Parties > A. Relativity® > 2. Import Documents from Relativity® in this Admin Guide.
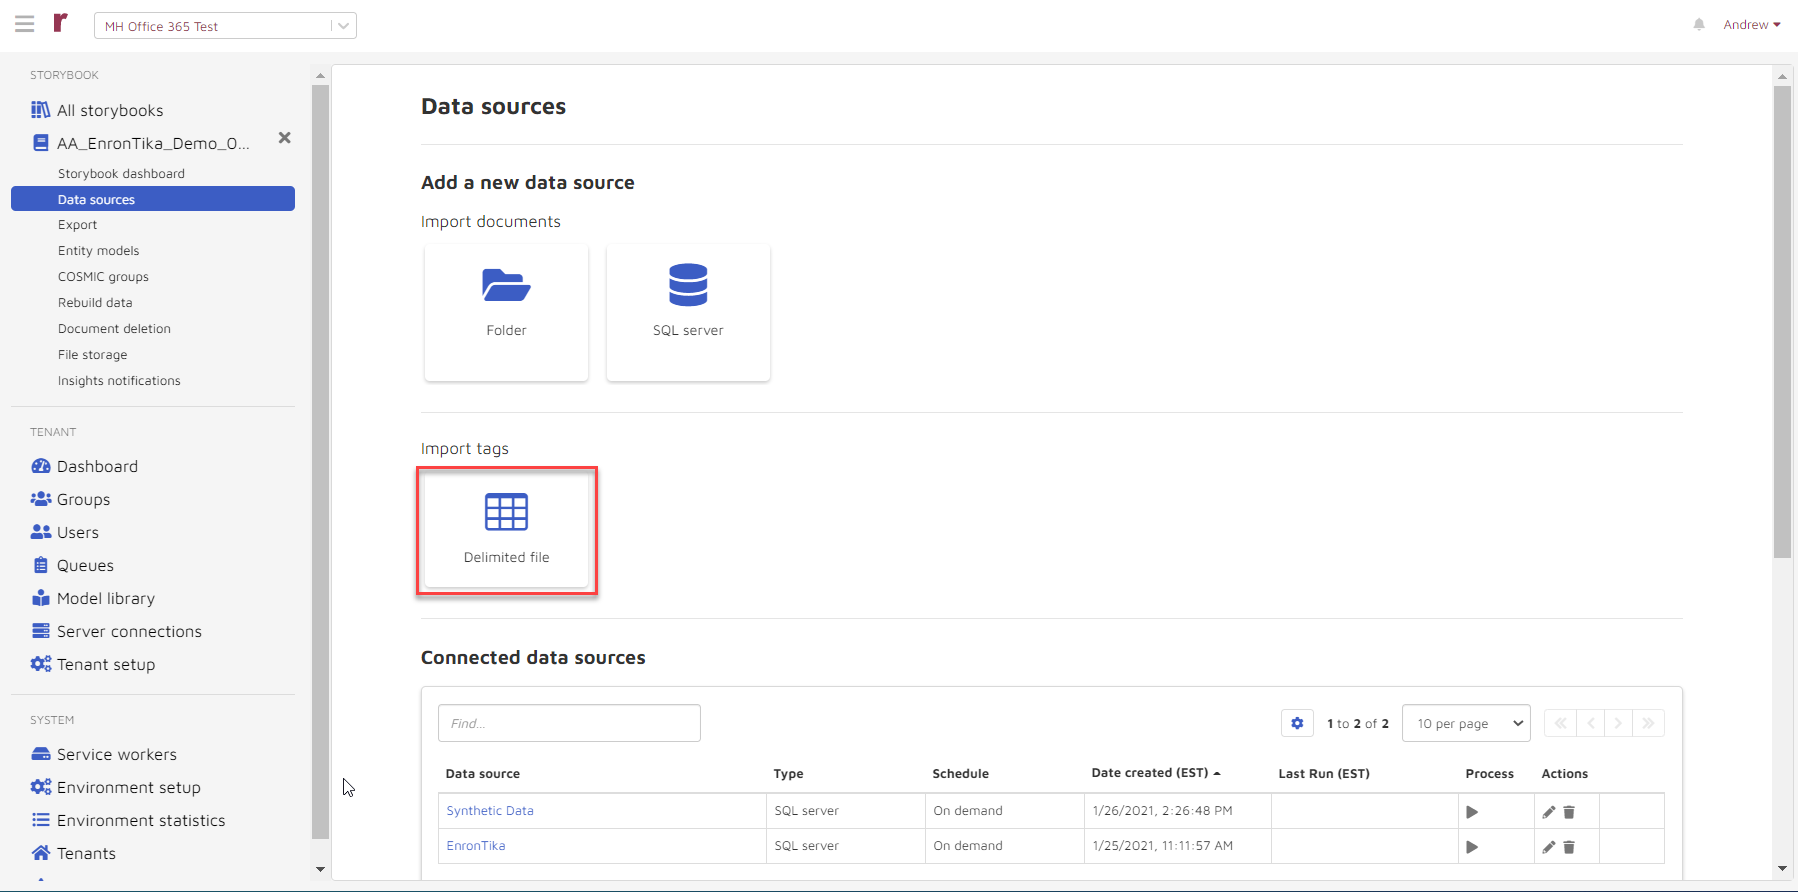
Import tags from delimited files
Choose the Delimited file option to import user tags or COSMIC tags to your existing documents.
Enter a data source name and upload your file. Note that the file must be comma-delimited.
The file you upload must contain:
One column with control number.
Other columns with COSMIC or external tags.
COSMIC tags must be labeled Yes, No or Skip. This is the indicator at the document level.
External tags may have any value.
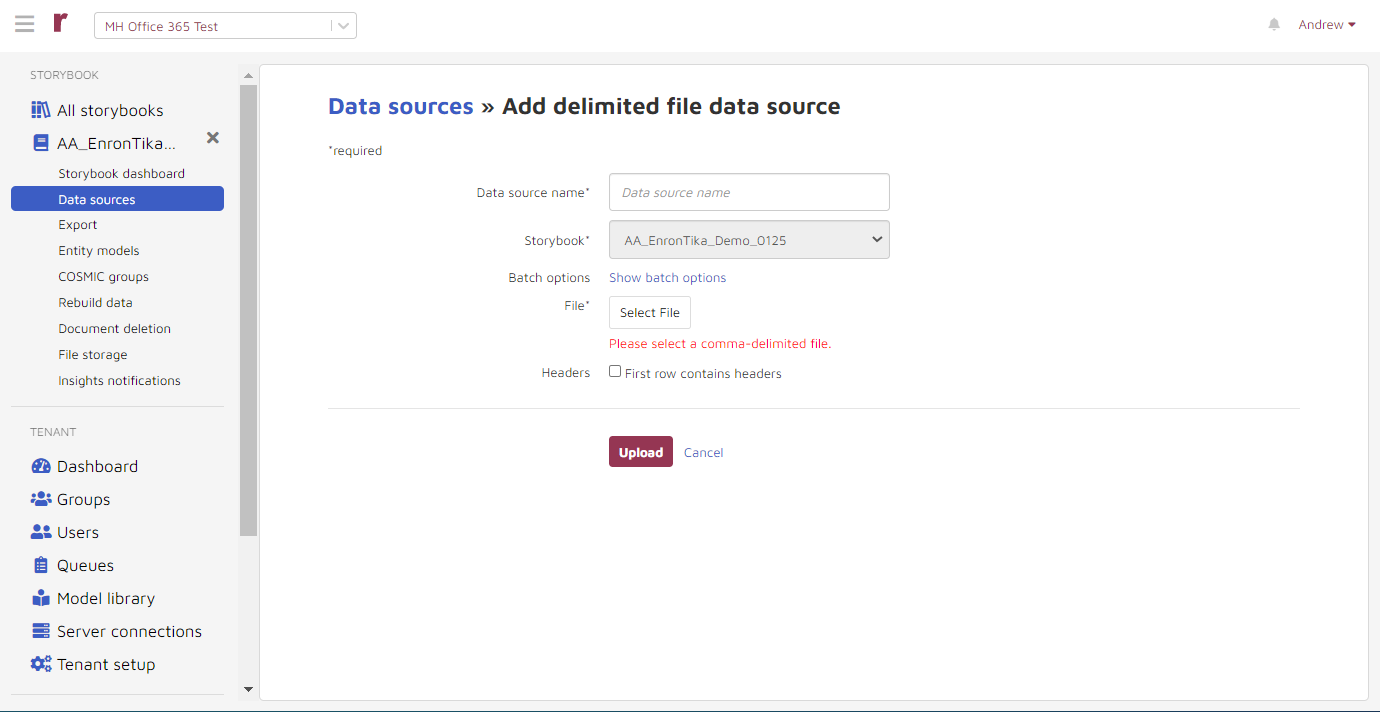
Batch options: Batch options are by default 10,000 documents with a timeout of 60 seconds, and this should work for most exports. However, you can change the settings if you are having issues with delays during export.
If your file contains headers in the first row, check “First row contains headers.”
Once your file is successfully uploaded you will see the following:
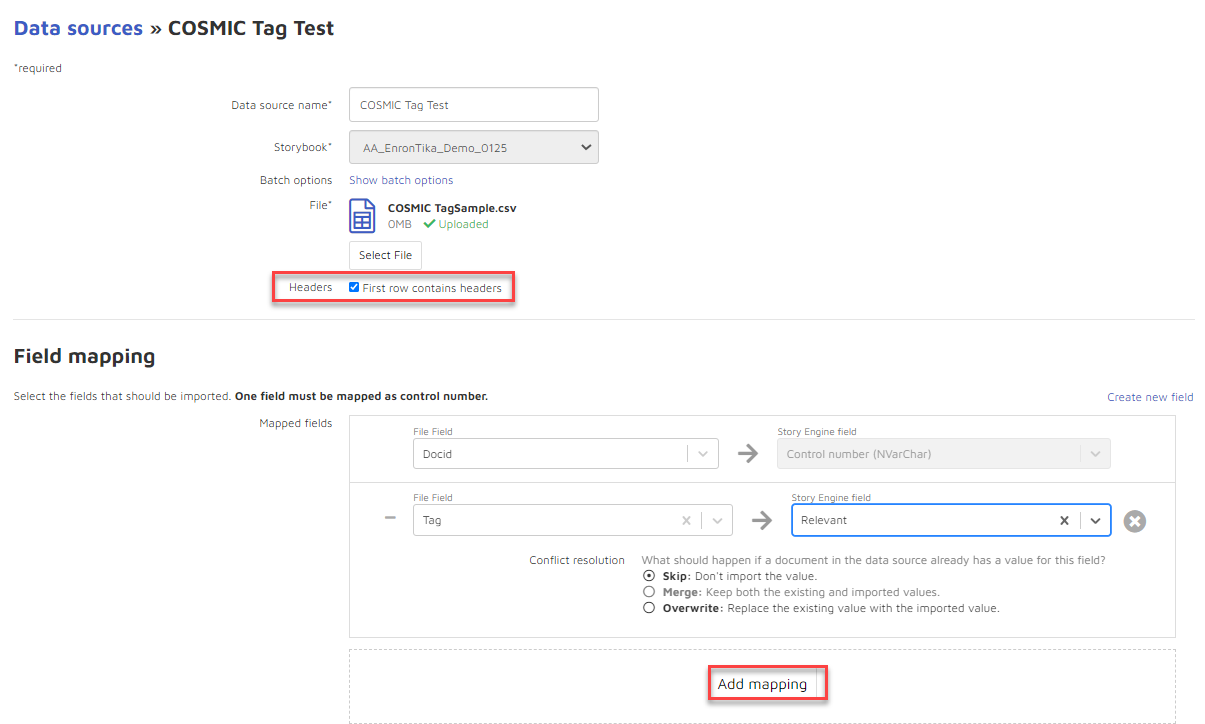
Map each field you wish to import using the field mapping tool.
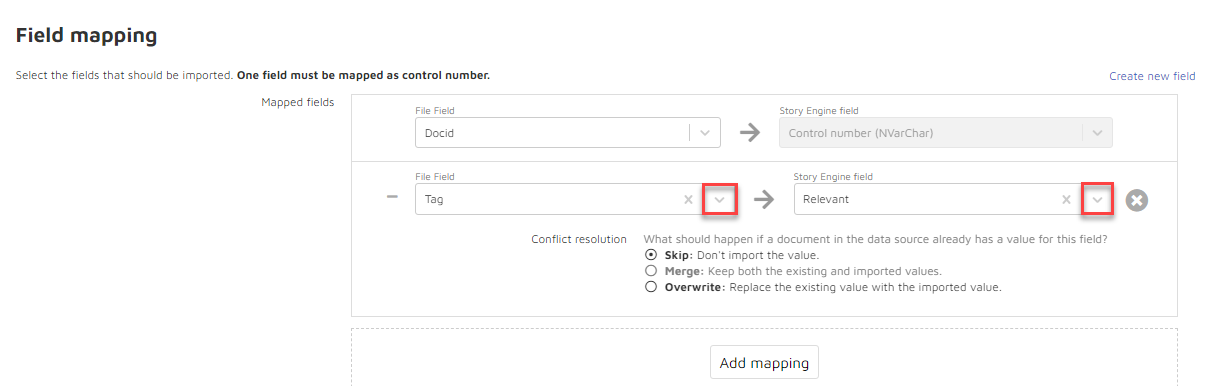
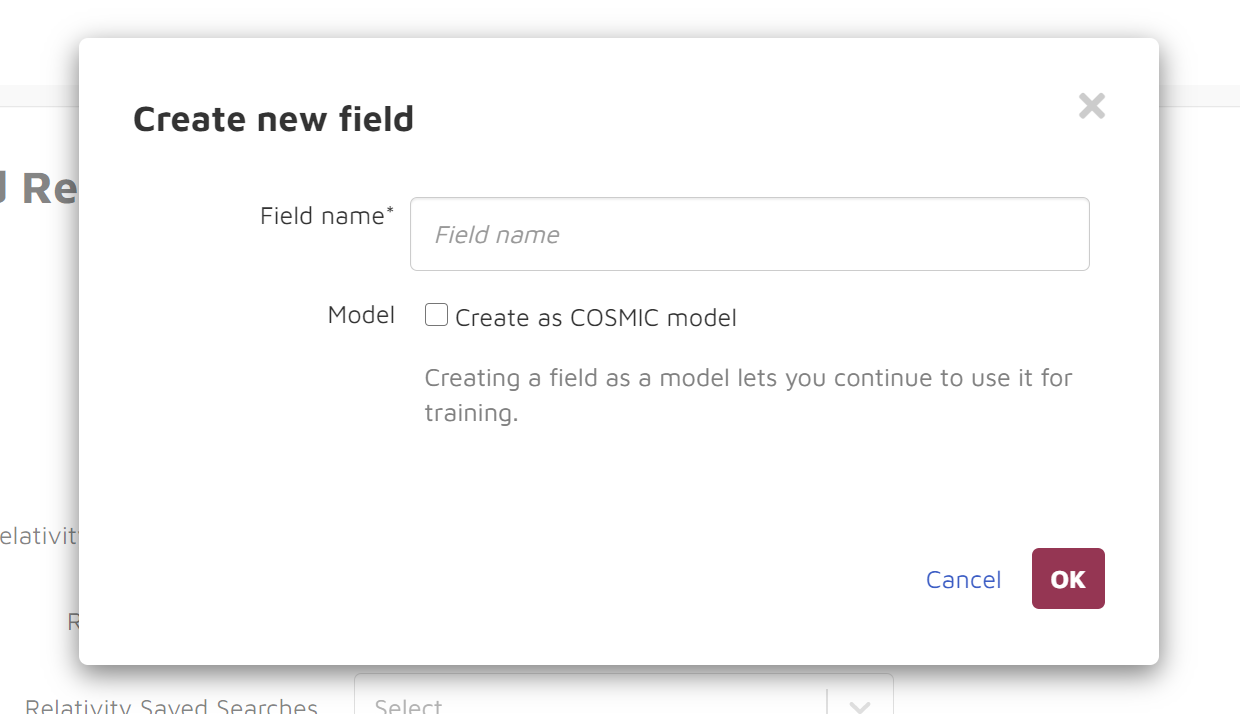
Select a Reveal AI field to which you wish to map your choices. If you would like to create a new field, click Create new field.
The following appears:
Choose a conflict resolution to tell the system what you want it to do if there are existing values that conflict with the newly uploaded values.
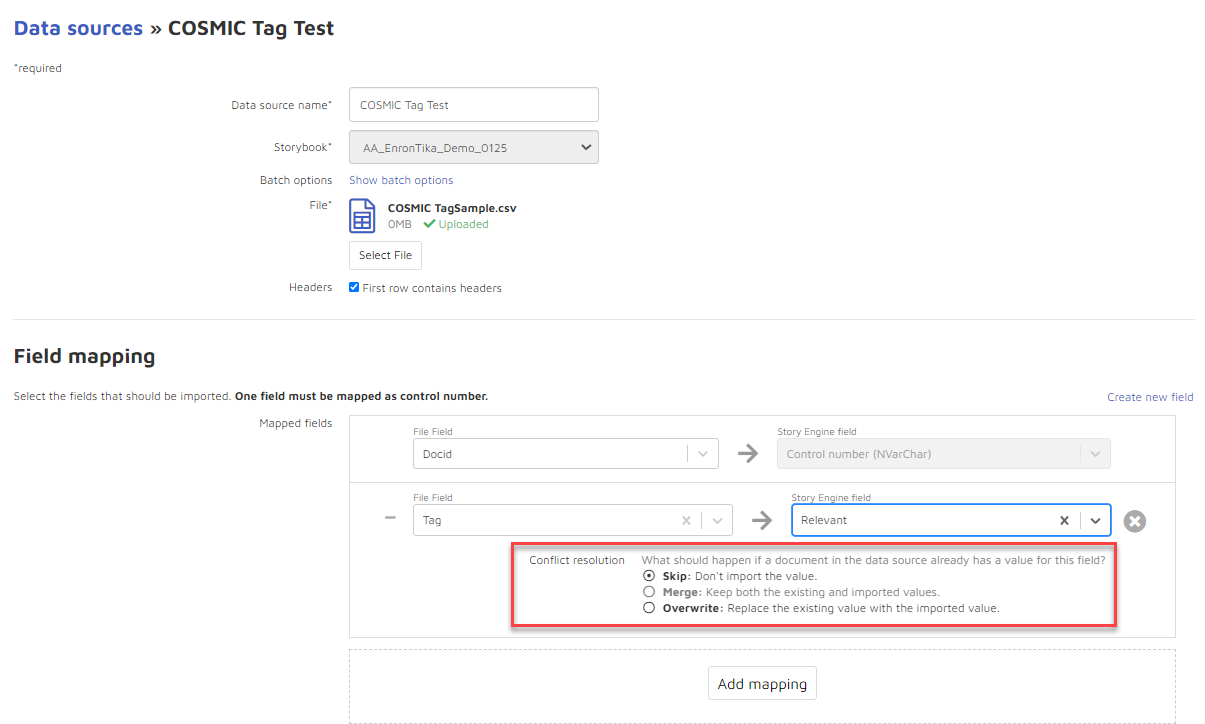
Skip: Don’t import the value.
Merge: Keep both the existing and imported values.
Overwrite: Replace the existing value with the imported value.
Once you begin processing:
A “Process data” task will begin running in the Notifications Center.
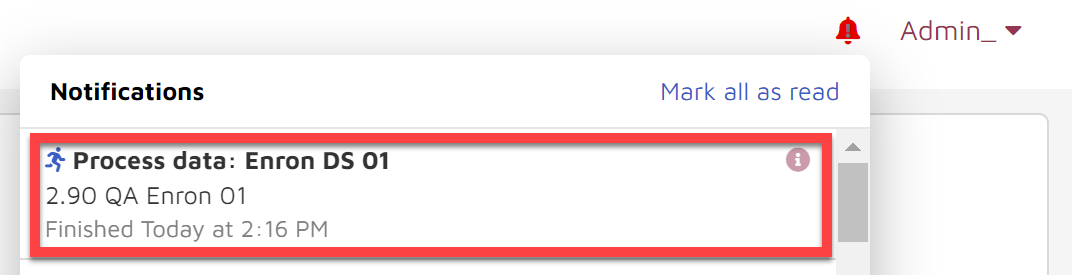
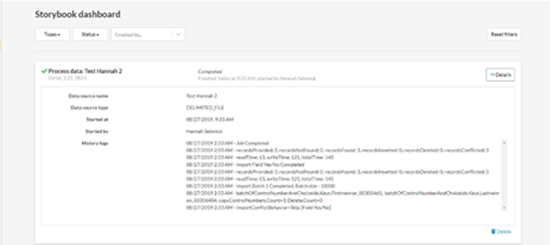
You can track the progress in the Storybook/ Admin dashboard.
Your delimited file data source will appear in the Data Sources list with type “Delimited file”.

After processing has completed, you should expect the following:
EXTERNAL TAGS: Your tags will now be available in search:
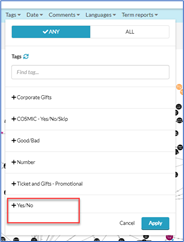
Note
New external tags will not be available on the document level as a user tag.
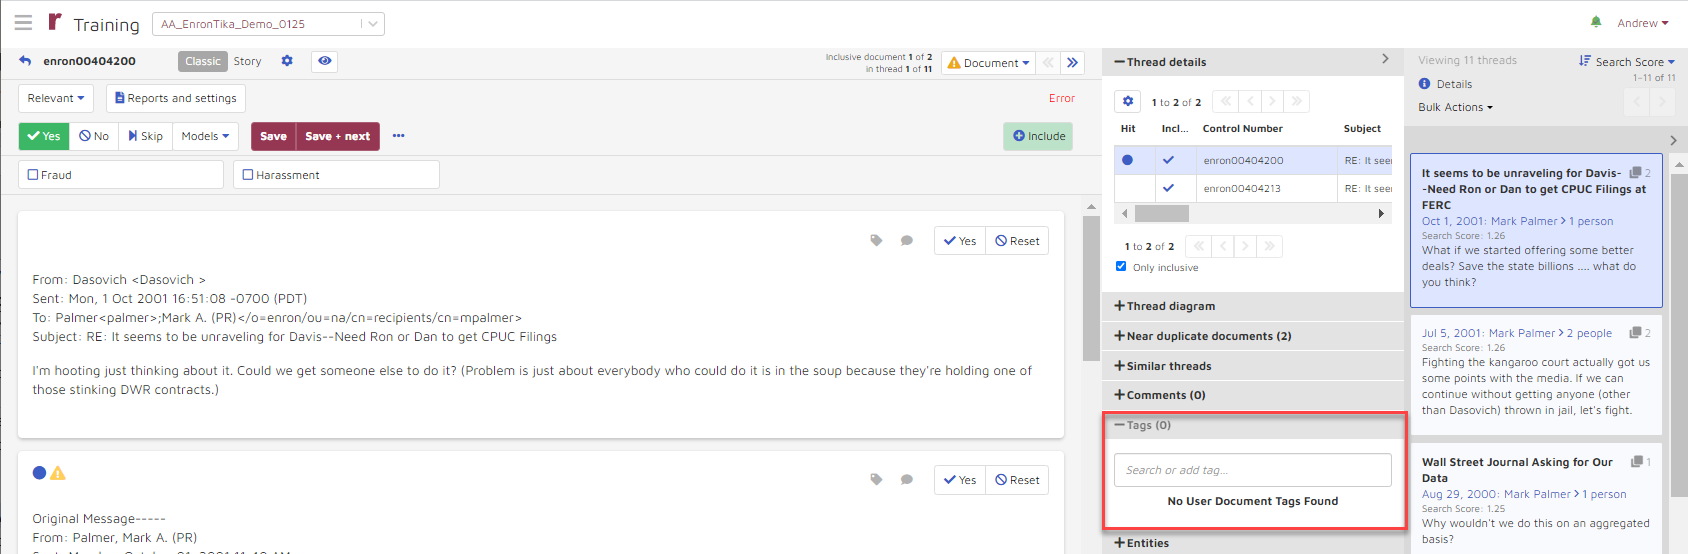
COSMIC TAGS: Correct tag (Yes / No / Skip) will be selected in the thread viewer.
Note
You cannot delete tags after they have been imported.
Import tags from Relativity®
Please see 4. Integration with 3rd Parties > A. Relativity® > 3. Import Tags from Relativity® in this Admin Guide.
Relativity® COSMIC Monitoring
Please see 4. Integration with 3rd Parties > A. Relativity® > 6. COSMIC Monitoring in this Admin Guide.
Important
Under the new Relativity® API, COSMIC Sync will not be available to users connected to RelativityOne. For these users COSMIC monitoring is recommended for tag synchronization.
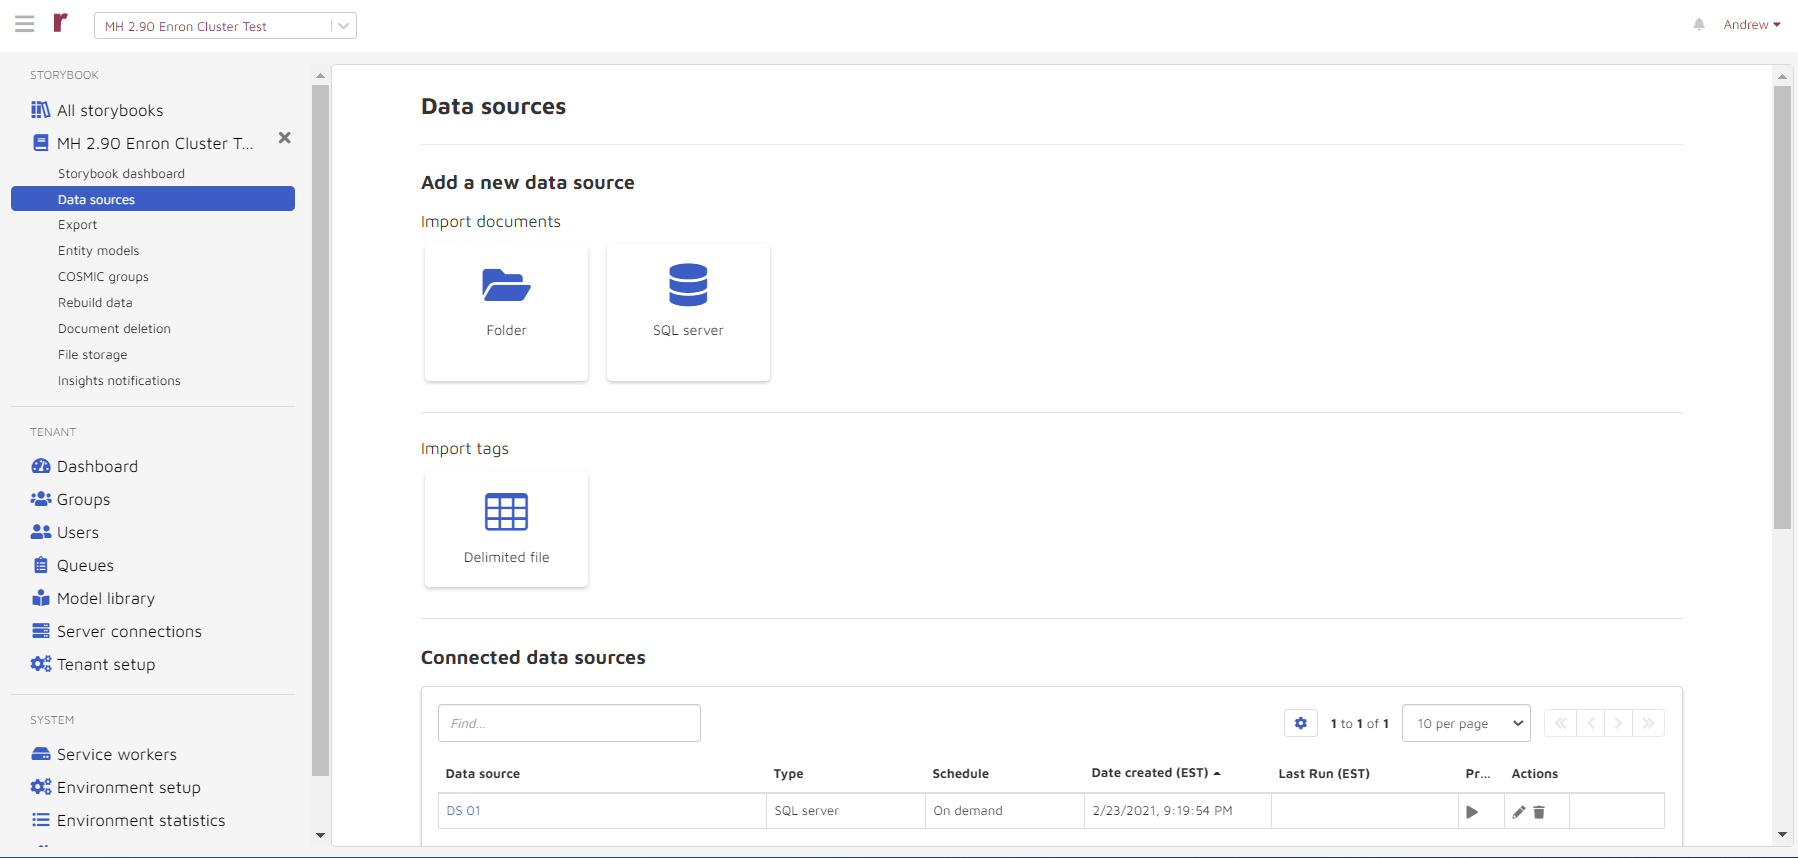
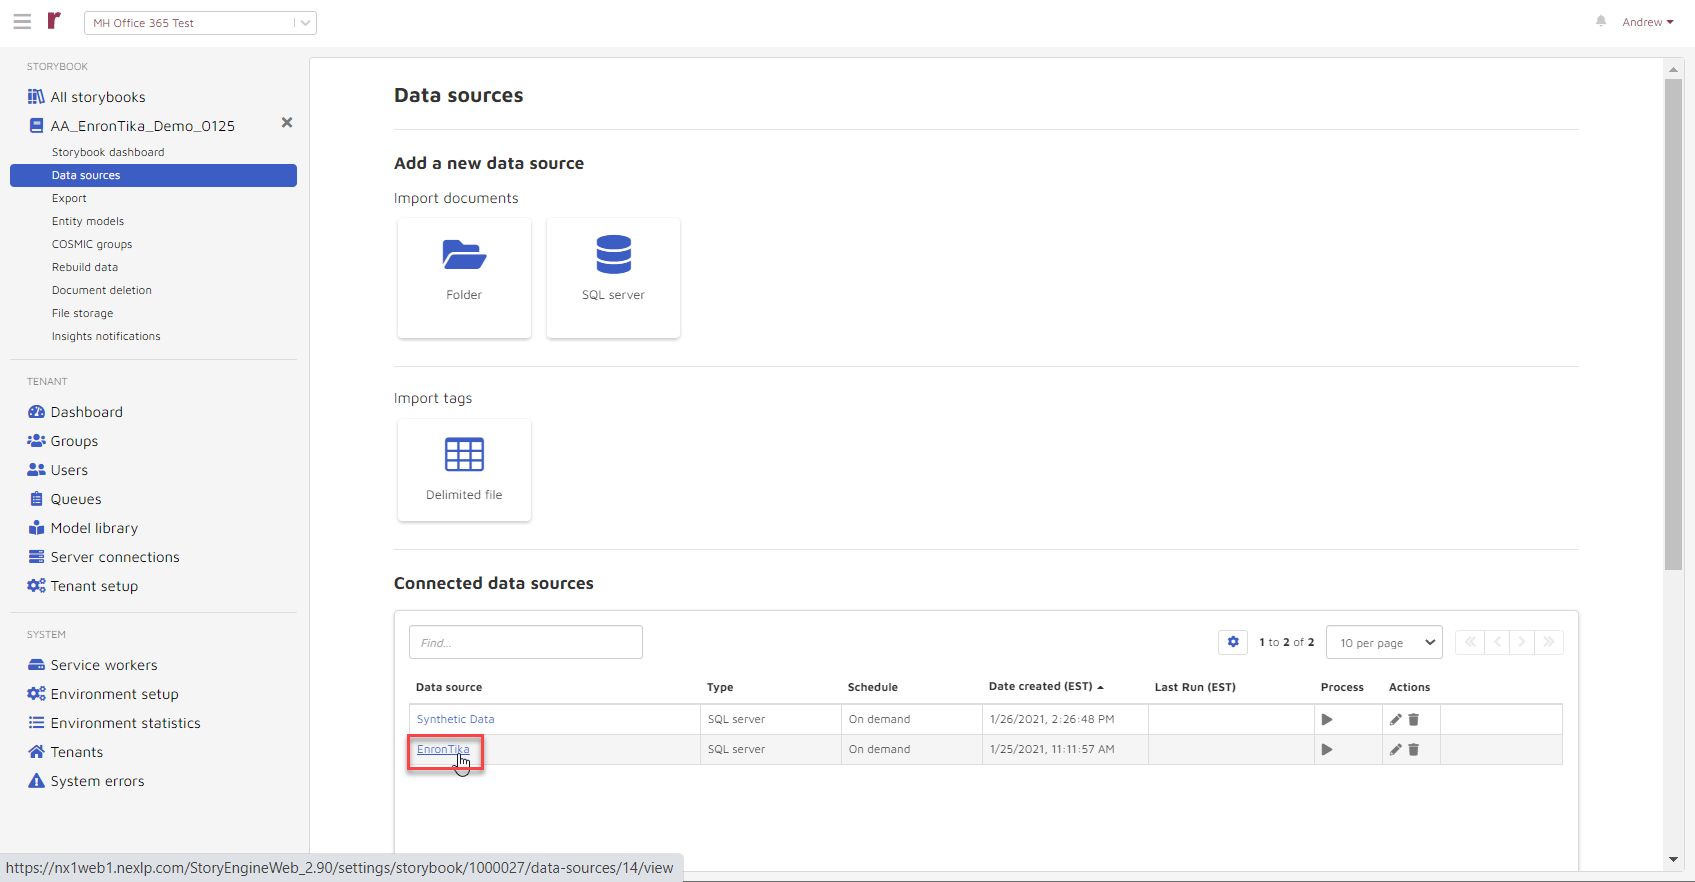
View data sources
After creation of a data source, new data sources will be available in the Connected data sources section.
Note
Data sources that appear in this list can be in all stages of processing.
Clicking the
 button under the “Process” column will:
Kick off processing if processing has not yet occurred.
Resume processing if it had been previously started and stopped.
Re-process if processing has already completed.
If you re-process, documents in your storybook will not be affected. Rather, any additional documents added to the data source will be processed.
Clicking the
 button allows user to edit properties of the data source. User can re-map field, re-name data source by using the edit function. Edits will be picked up upon the next processing.
Clicking the
 button allows user to delete the data source.
Note
Deleting the data source will not delete documents from the storybook. In order to delete documents permanently, follow the instructions under Section 1.H Document deletion.
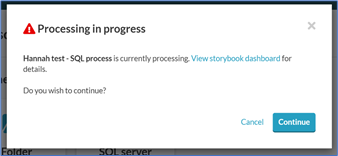
If attempting to re-process, edit or delete a data source while processing is in progress, you will see a warning message:
Click on a data source...
...to see all completed, errored, stopped, or running processes.

Expand details on each task to view & download logs.
Summary: provides processing results in detail.
Processing: includes processing exceptions.
Performance: includes performance metrics.
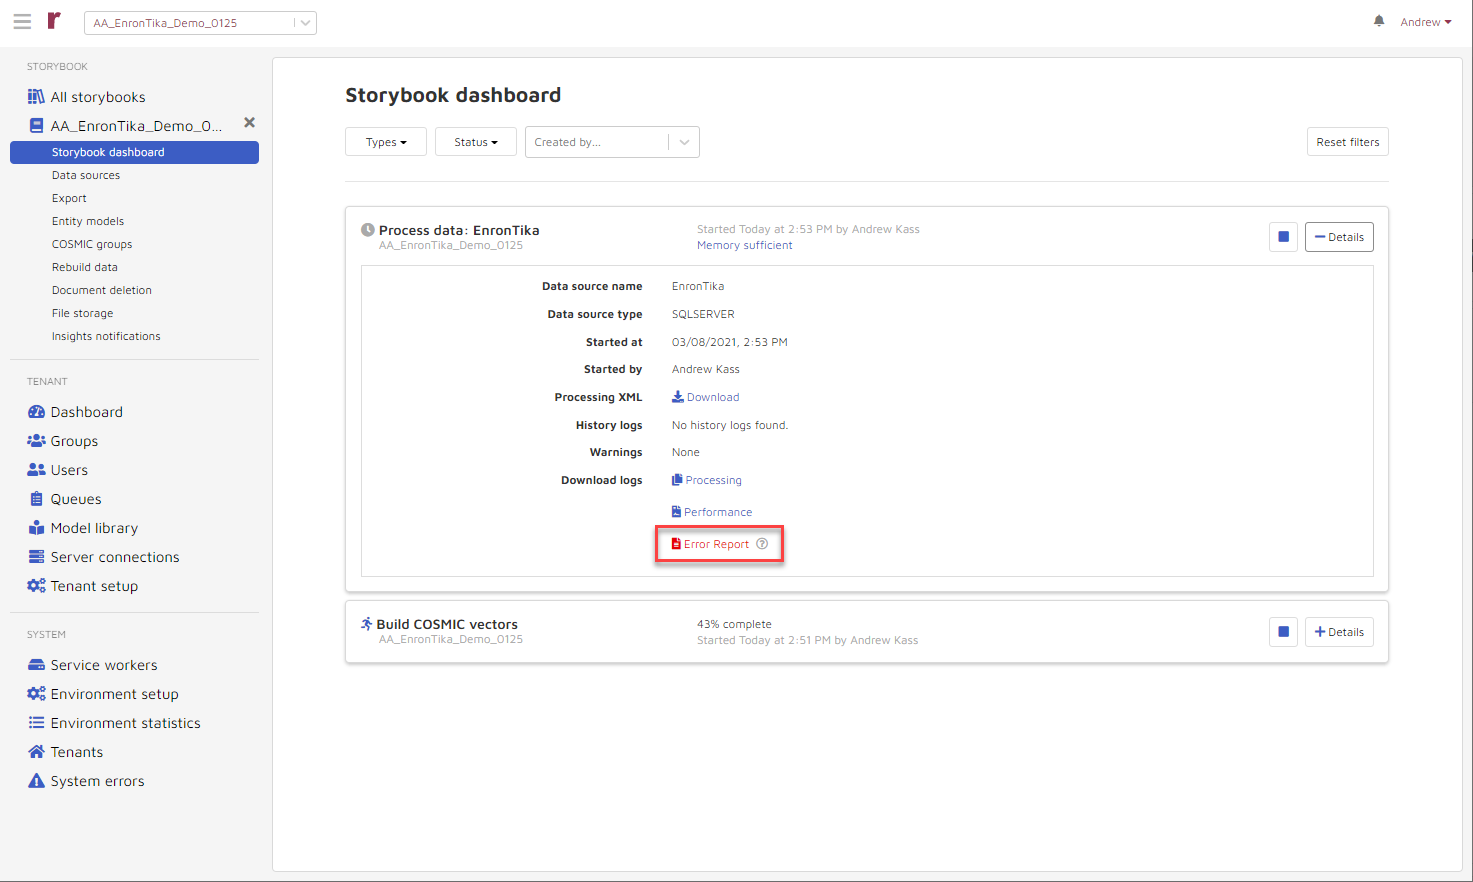
The Error Report highighted above in red is described in Appendix E. New “Error Report” Function in Front-End/NPA.
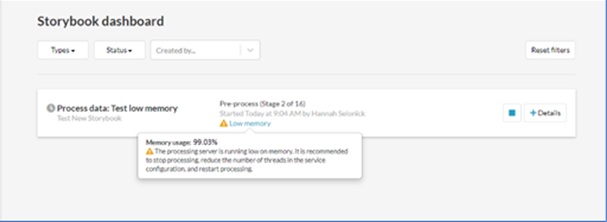
If your memory usage exceeds 99% you will see a Low memory warning. It is recommended to stop processing, reduce the number of threads in the service configuration and restart processing.