Printing Documents
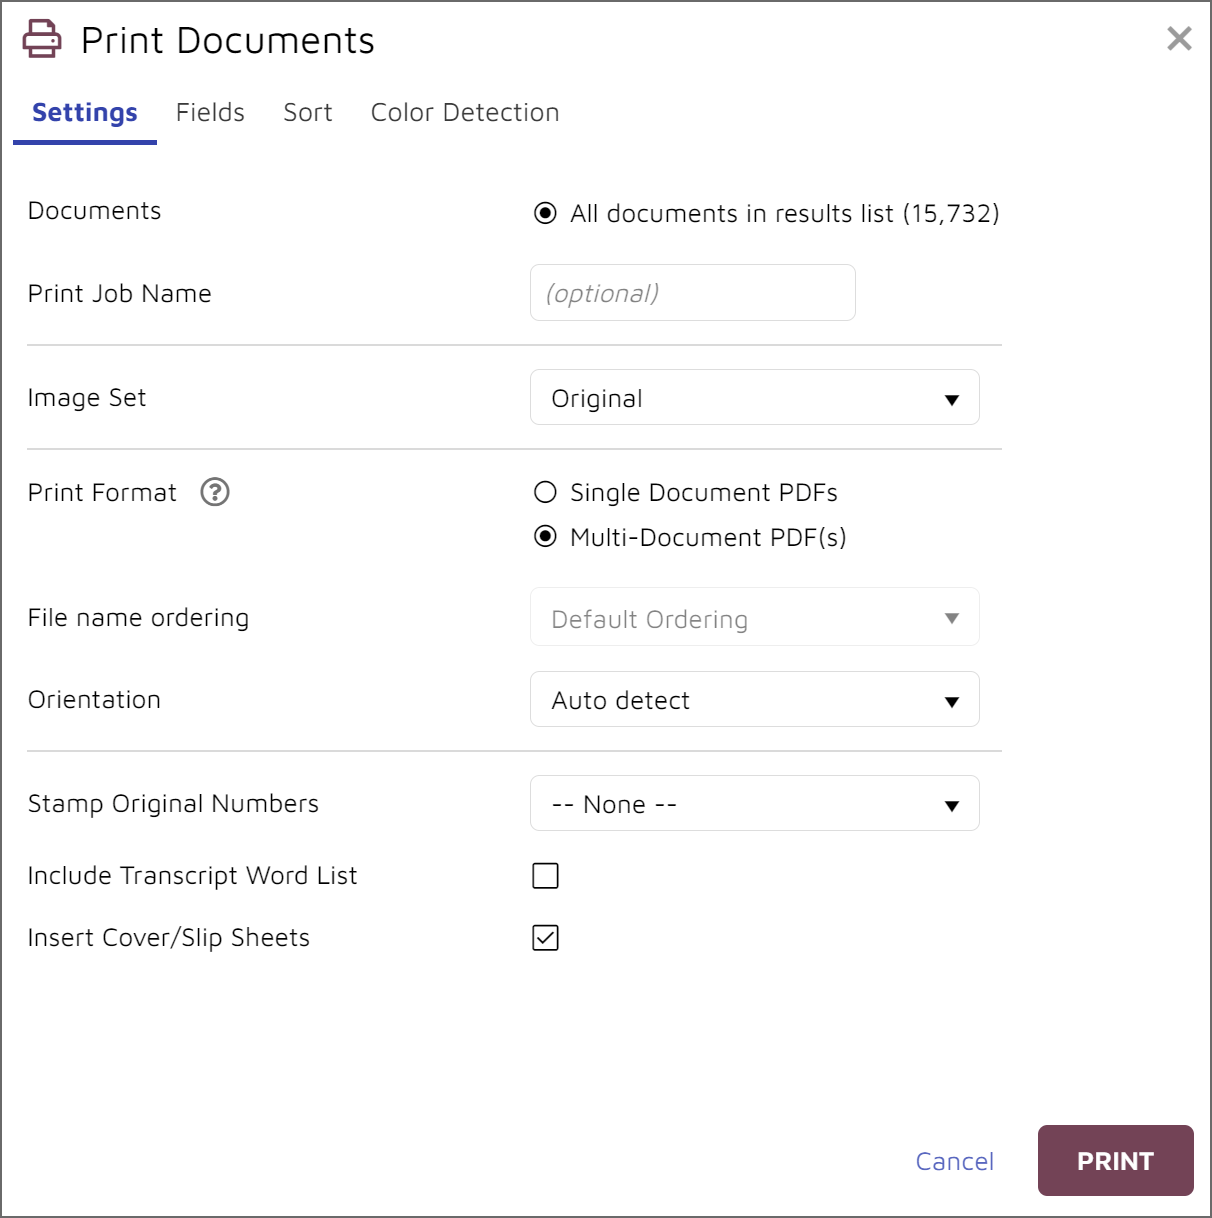
To Print a set of documents to PDF, run a search or select a folder of documents and select the Print option.

Select the number of documents to include.
Add a name to track the print job.
Select which image set if there are multiple image sets.
Choose Single Document PDFs or Multi-Document PDF(s). If printing Multi-Document PDF, selecting Insert Cover/Slip Sheets is strongly advised. Bulk Print will automatically generate searchable PDFs.
Select Stamp Original Numbers and the location if you wish to include an identifier. This is not a bates stamp, but the document number.
Include Transcript Word List and/or Insert Cover/Slip Sheet.
Select which Fields you would like to include in the cover or slip sheet for each document.
Select the field(s) to sort on and sort order.
Color Handling - this option gives you the ability to customize the handling of color documents on a document basis. Settings for various colors and color safe image are present on this tab.
Choose Submit to complete the job.
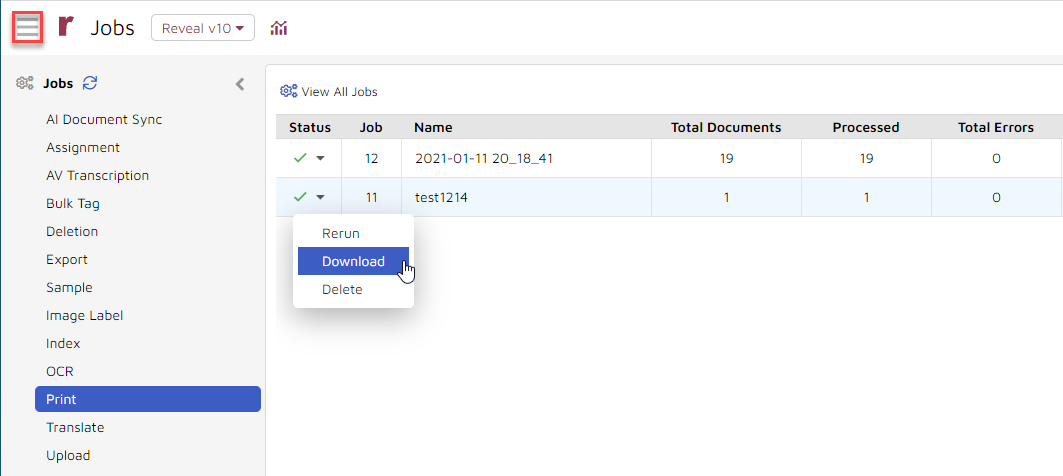
The job may be monitored and retrieved under Jobs > Print via the Flyout Menu.
The menu for a Print Job that is currently running will offer a Stop option.
The menu for a completed Print Job will have options to Rerun, Download or Delete the job. Download will contain a .ZIP container of the printed content and a CSV format log of any errors.

Note
If you wish to print a single document to your a print device configured on your computer, use the Print function in the Document Review screen. In order to conserve bandwidth, you may not bulk print multiple documents to a locally-defined device.